
Create a device overview app with SICON.OS API and Next.js
Goal of the Example
Create an overview of devices and view their production status updating in real time.
You can then use the example as good base for further features.
Below you can see a preview of what the final result looks like.
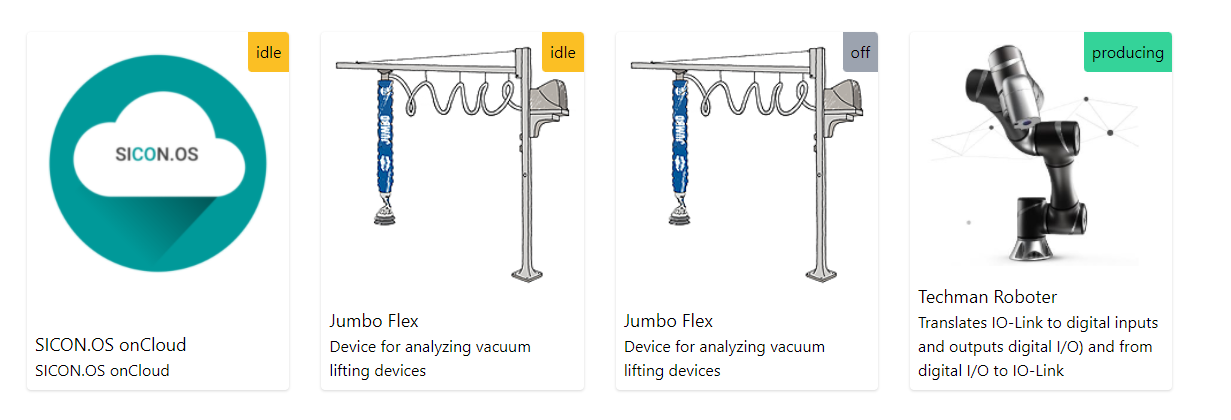
With that, you can now tell when your machines are working and how many of them. Overview maintenance as they happen and be aware of incidents.
If you get stuck at any point, you can check the source code of the application on GitHub.
What we will need
SICON.OS
If you don’t have your own SICON.OS installation to visualize devices from, we have a demo cloud ready that will also be used throughout the tutorial. SICON.OS provides both a HTTP and MQTT API to build custom apps on top.
HTTP API:
HTTP APIs provide data in a machine-readable format. The data can be consumed by your app to display information about your devices and their events, or to log in with a service.
MQTT API:
MQTT is a protocol to exchange event-driven data on a message bus. It allows us to retrieve updates like a new device status or new events for a specific device. Without needing to manually refresh the page.
Next.js:
Next is a lightweight development framework to create server rendered applications in React. Next.js will take care of the heavy lifting of the application build such as code splitting, HMR (hot module replacement) SSR (server side rendering) and allow us to focus on writing the code, not our build config. No more configuration and build tinkering.
React:
React is one of the most popular front end Javascript frameworks, developed by facebook and used by countless tech companies including Netflix, Airbnb and GitHub to build web applications. React is a declarative library that makes it easy to create interactive user interfaces, keeping the code base organized through its component based architecture.
TailwindCSS
Tailwind is a CSS library with many utilities to make prototyping layouts quick and easy. It can also be used to style the individual elements that compose our UI throughout the app. That means never needing to leave your app code to write styles for display and more productivity. Tailwind is trusted by many enterprises to create living user experiences.
NodeJS
NodeJS is the JavaScript engine that can run on your filesystem or any server. The runtime is required to build and develop the app.
Setup
Visual Studio Code
If you are working with VS Code, we recommend to use these extensions:
ESLint - for catching and fixing common coding pitfalls
EditorConfig - to apply consistent code style
Get NodeJS
You can download NodeJS for your platform on the official website.
Follow the instructions to install the executable. Afterwards commands like node, npx or npm are available to your system.
Create A New NextJS Project
Open up a terminal of your choice and paste this command to create a new project.
npx create-next-app@latest --typescript -e https://github.com/GPS-GmbH/next-example-tailwindcss-typescript sicon-next-exampleRun the developer mode to start a local server to see updates to your app as you code.
cd sicon-next-example
npm run dev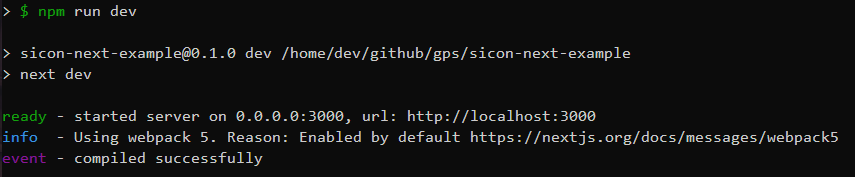
Now you can start developing the app.
Open the provided URL (http://localhost:3000) to see a web app greeting you with successful setup.
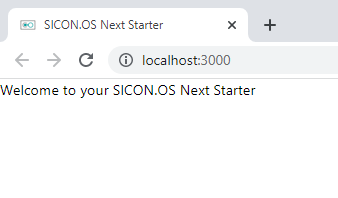
After that, open the project in your code editor of choice.
Authentication
In order to retrieve data from SICON.OS to show in our app, we need to authenticate with SICON.OS.
This avoids unrestricted access from stealing or overwriting data.
Set Up The API communication
Create a file api.ts in the root of your project to set up the API communication between SICON.OS and your app.
import Axios from 'axios'

const hostname = 'device.cloud.sicon.eco'
export const httpUrl = `https://${hostname}`
export const mqttUrl = `wss://${hostname}`

const token = 'eyJhbGciOiJIUzI1NiIsInR5cCI6IkpXVCJ9.eyJJRCI6NCwiVXNlciI6ImV4YW1wbGUiLCJGaXJzdG5hbWUiOiJleGFtcGxlIiwiTGFzdG5hbWUiOiJleGFtcGwiLCJFbWFpbCI6ImV4YW1wbGVAZXhhbXBsZS5jb20iLCJTeXN0ZW0iOjAsIlJvbGUiOnsiSUQiOjUsIk5hbWUiOiJPcHRpbWl6ZXIiLCJTeXN0ZW0iOjAsIkRlc2NyaXB0aW9uIjoicHJvY2VzcyBlbmdpbmVlciwgY2FuIGNoYW5nZSBwYXJhbWV0ZXJzIn0sIlByaXZpbGVnZXMiOlsiYXBwc3RvcmVfdmlldyIsInNldHRpbmdzX3JlYWQiLCJhc3NldHNfcmVhZCIsImFwcHNfc2ljb25fdmlldyIsImFwcHNfc2ljb25fbm9kZSIsImRldmljZV90cmVlX3JlYWQiXSwiaWF0IjoxNjM0MTI5MTkzfQ.WAbHaXMyAwe9p6zyx6DIHuhMbNpB1ZYUJepChYGn4PM'

const api = Axios.create({
	baseURL: `${httpUrl}/api/v1`,
	headers: {
		Authorization: `Bearer ${token}`
	}
})

export const withBase = (path: string | undefined) => `${httpUrl}/${path}`

export default api
Here we use a demo API token and a demo SICON.OS installation. You can replace that with your own URL as long as it includes /api/v1 at the end.
From now on we can use this module to consume data in all parts of the app.
Grab Your Personal SICON.OS API Key
This step is optional if you use our demo API.
You can either use username and password and authenticate with our SICON.OS HTTP API.
For simplicity, we just copy the API key for a user with enough permissions to read device data.
In your installation, go to Settings > Users and click on "Copy" next to the field labelled “JWT Token”.
Lastly, replace the blank token in your api.ts file with the copied one.
Make sure you don’t remove the quotes ('') around the token.
Preparing The Components

Our UI will consist of a list of DeviceCards. Which will display a ProductionStatus.
Let’s first create the components/ProductionStatus.tsx file. Paste the following contents into it.
import { Hardware } from 'sicon-os-types'

const productionStatusColors = {
	incident: 'bg-red-400',
	maintenance: 'bg-yellow-600',
	changeover: 'bg-blue-400',
	idle: 'bg-yellow-400',
	producing: 'bg-green-400',
	off: 'bg-gray-400',
}

const ProductionStatus = (device: Hardware) => {
	return <div className={`p-2 ${productionStatusColors[device.ProductionStatus.Status]}`}>
		{device.ProductionStatus.Status}
	</div>
}

export default ProductionStatus
Next up create the components/DeviceCard.tsx file. Here we can make use of the ProductionStatus component inside.
import { Hardware } from 'sicon-os-types'
import ProductionStatus from './ProductionStatus'
import { withBase } from '../api'

interface Props {
	device: Hardware
}

const DeviceCard = ({ device }: Props) => {
	return <div className="flex flex-col justify-between shadow h-full rounded relative overflow-hidden">
		<div className="absolute top-0 right-0 rounded-bl overflow-hidden">
			<ProductionStatus device={device} />

		</div>
		<img src={withBase('docs/img/' + device.PictureFileName)} className="m-2" alt="" />
		<div className="p-2">
			<div className="text-lg">{device.ProductName}</div>
			<div>{device.Description}</div>
		</div>
	</div>

}
export default DeviceCard
It is important to note that device.PictureFileName does not give us a full URL to display a picture of the device. We need to assemble it with the path https://device.cloud.sicon.eco + /docs/img/ + the filename. This is how all pictures and device documentations are stored on SICON.OS.
Building The Device Overview
In pages/index.tsx - the homepage of our app, we make use of our DeviceCard component. Here we list the devices and show their basic identification properties. Along with a production status to indicate what the device is doing right now.
import type { NextPage } from 'next'
import Head from 'next/head'
import { Fragment, useEffect, useState } from 'react'
import { Hardware, CollectionResponse } from 'sicon-os-types'
import api from '../api'
import DeviceCard from '../components/DeviceCard'

const Home: NextPage = () => {
	const [devices, setDevices] = useState<Hardware[]>([])
	useEffect(() => {
		const getHardware = async () => {
			const devices = (await api.get<CollectionResponse<Hardware>>('hardware')).data.items
			setDevices(devices)
		}
		getHardware()
	}, [])
	return (
		<Fragment>
			<Head>
				<title>SICON.OS Next Starter</title>
				<meta name="description" content="SICON.OS Next Starter" />
				<link rel="icon" href="/favicon.png" />
			</Head>
			<main className="flex flex-wrap p-4">
				{devices.map(device => <div className="p-4 w-full md:w-1/3 lg:w-1/4 xl:w-1/6" key={device.ID}>
					<DeviceCard device={device} />
				</div>)}
			</main>
		</Fragment>
	)
}

export default Home
That’s it! We’ve now already created a responsive list of devices together with a picture, basic descriptions and a production status in the top right corner of the cards.
We first retrieve the data and make it available for rendering through the API with useEffect and api.get(). Afterwards we do a state-driven render of that data with HTML.
Making It Update
However this page has one problem. On a shopfloor, the production status can change any second. Whenever the machine idles, produces or is in maintenance. You can find a full list in the ProductionStatus type of the sicon-os-types package. It is automatically included in the next-example-tailwindcss-typescript starter kit you installed.
To connect with the MQTT Api, we need to install one more library.
In your terminal, type this command to install mqtt.
npm install mqttFinally we have to connect to the MQTT API and update the device state to show live changes.
Update your index.tsx by overwriting it with the content below.
import type { NextPage } from 'next'
import Head from 'next/head'
import { Fragment, useEffect, useState } from 'react'
import api, { mqttUrl } from '../api'
import DeviceCard from '../components/DeviceCard'
import { Hardware, CollectionResponse } from 'sicon-os-types'
import mqtt from 'mqtt'

const Home: NextPage = () => {
	const [devices, setDevices] = useState<Hardware[]>([])
	useEffect(() => {
		const getHardware = async () => {
			const devices = (await api.get<CollectionResponse<Hardware>>('hardware')).data.items
			setDevices(devices)
		}
		getHardware()
	}, [])
	useEffect(() => {
		const client = mqtt.connect(mqttUrl)
		client.subscribe('device/+/changeProductionStatus')
		client.on('message', (topic, message) => {
			const deviceId = parseInt(topic.split('/')[1])
			setDevices(devices.map(device => ({
				...device,
				ProductionStatus: device.ID == deviceId ? JSON.parse(message.toString()) : device.ProductionStatus
			})))
		})
		return () => { client.end() }
	})
	return (
		<Fragment>
			<Head>
				<title>SICON.OS Next Starter</title>
				<meta name="description" content="SICON.OS Next Starter" />
				<link rel="icon" href="/favicon.png" />
			</Head>
			<main className="flex flex-wrap p-4">
				{devices.map(device => <div className="p-4 w-full md:w-1/3 lg:w-1/4 xl:w-1/6" key={device.ID}>
					<DeviceCard device={device} />
				</div>)}
			</main>
		</Fragment>
	)
}

export default Home
We import and use mqtt to start a connection to the same SICON.OS installation we defined in api.ts.
We then subscribe for changes to device/+/changeProductionStatus - which will notify us of changes.
Finally we apply the change by overwriting the ProductionStatus property of the correct device.
Result
We are now done! Save the file and see the result in your browser.
It should look like this.
You can see the finished working example on codesandbox.
The source code is available on GitHub.
Deployment
Once you are done developing, you can build the application and run it either as server or export a static page including only HTML, CSS and JS to put on a webserver.
npm run buildNext comes with its own web server if you prefer that. You can run it with the command below.
npm run startNow you can access the application from http://localhost:3000