
2. Deploy your app to your local SICON.OS installation
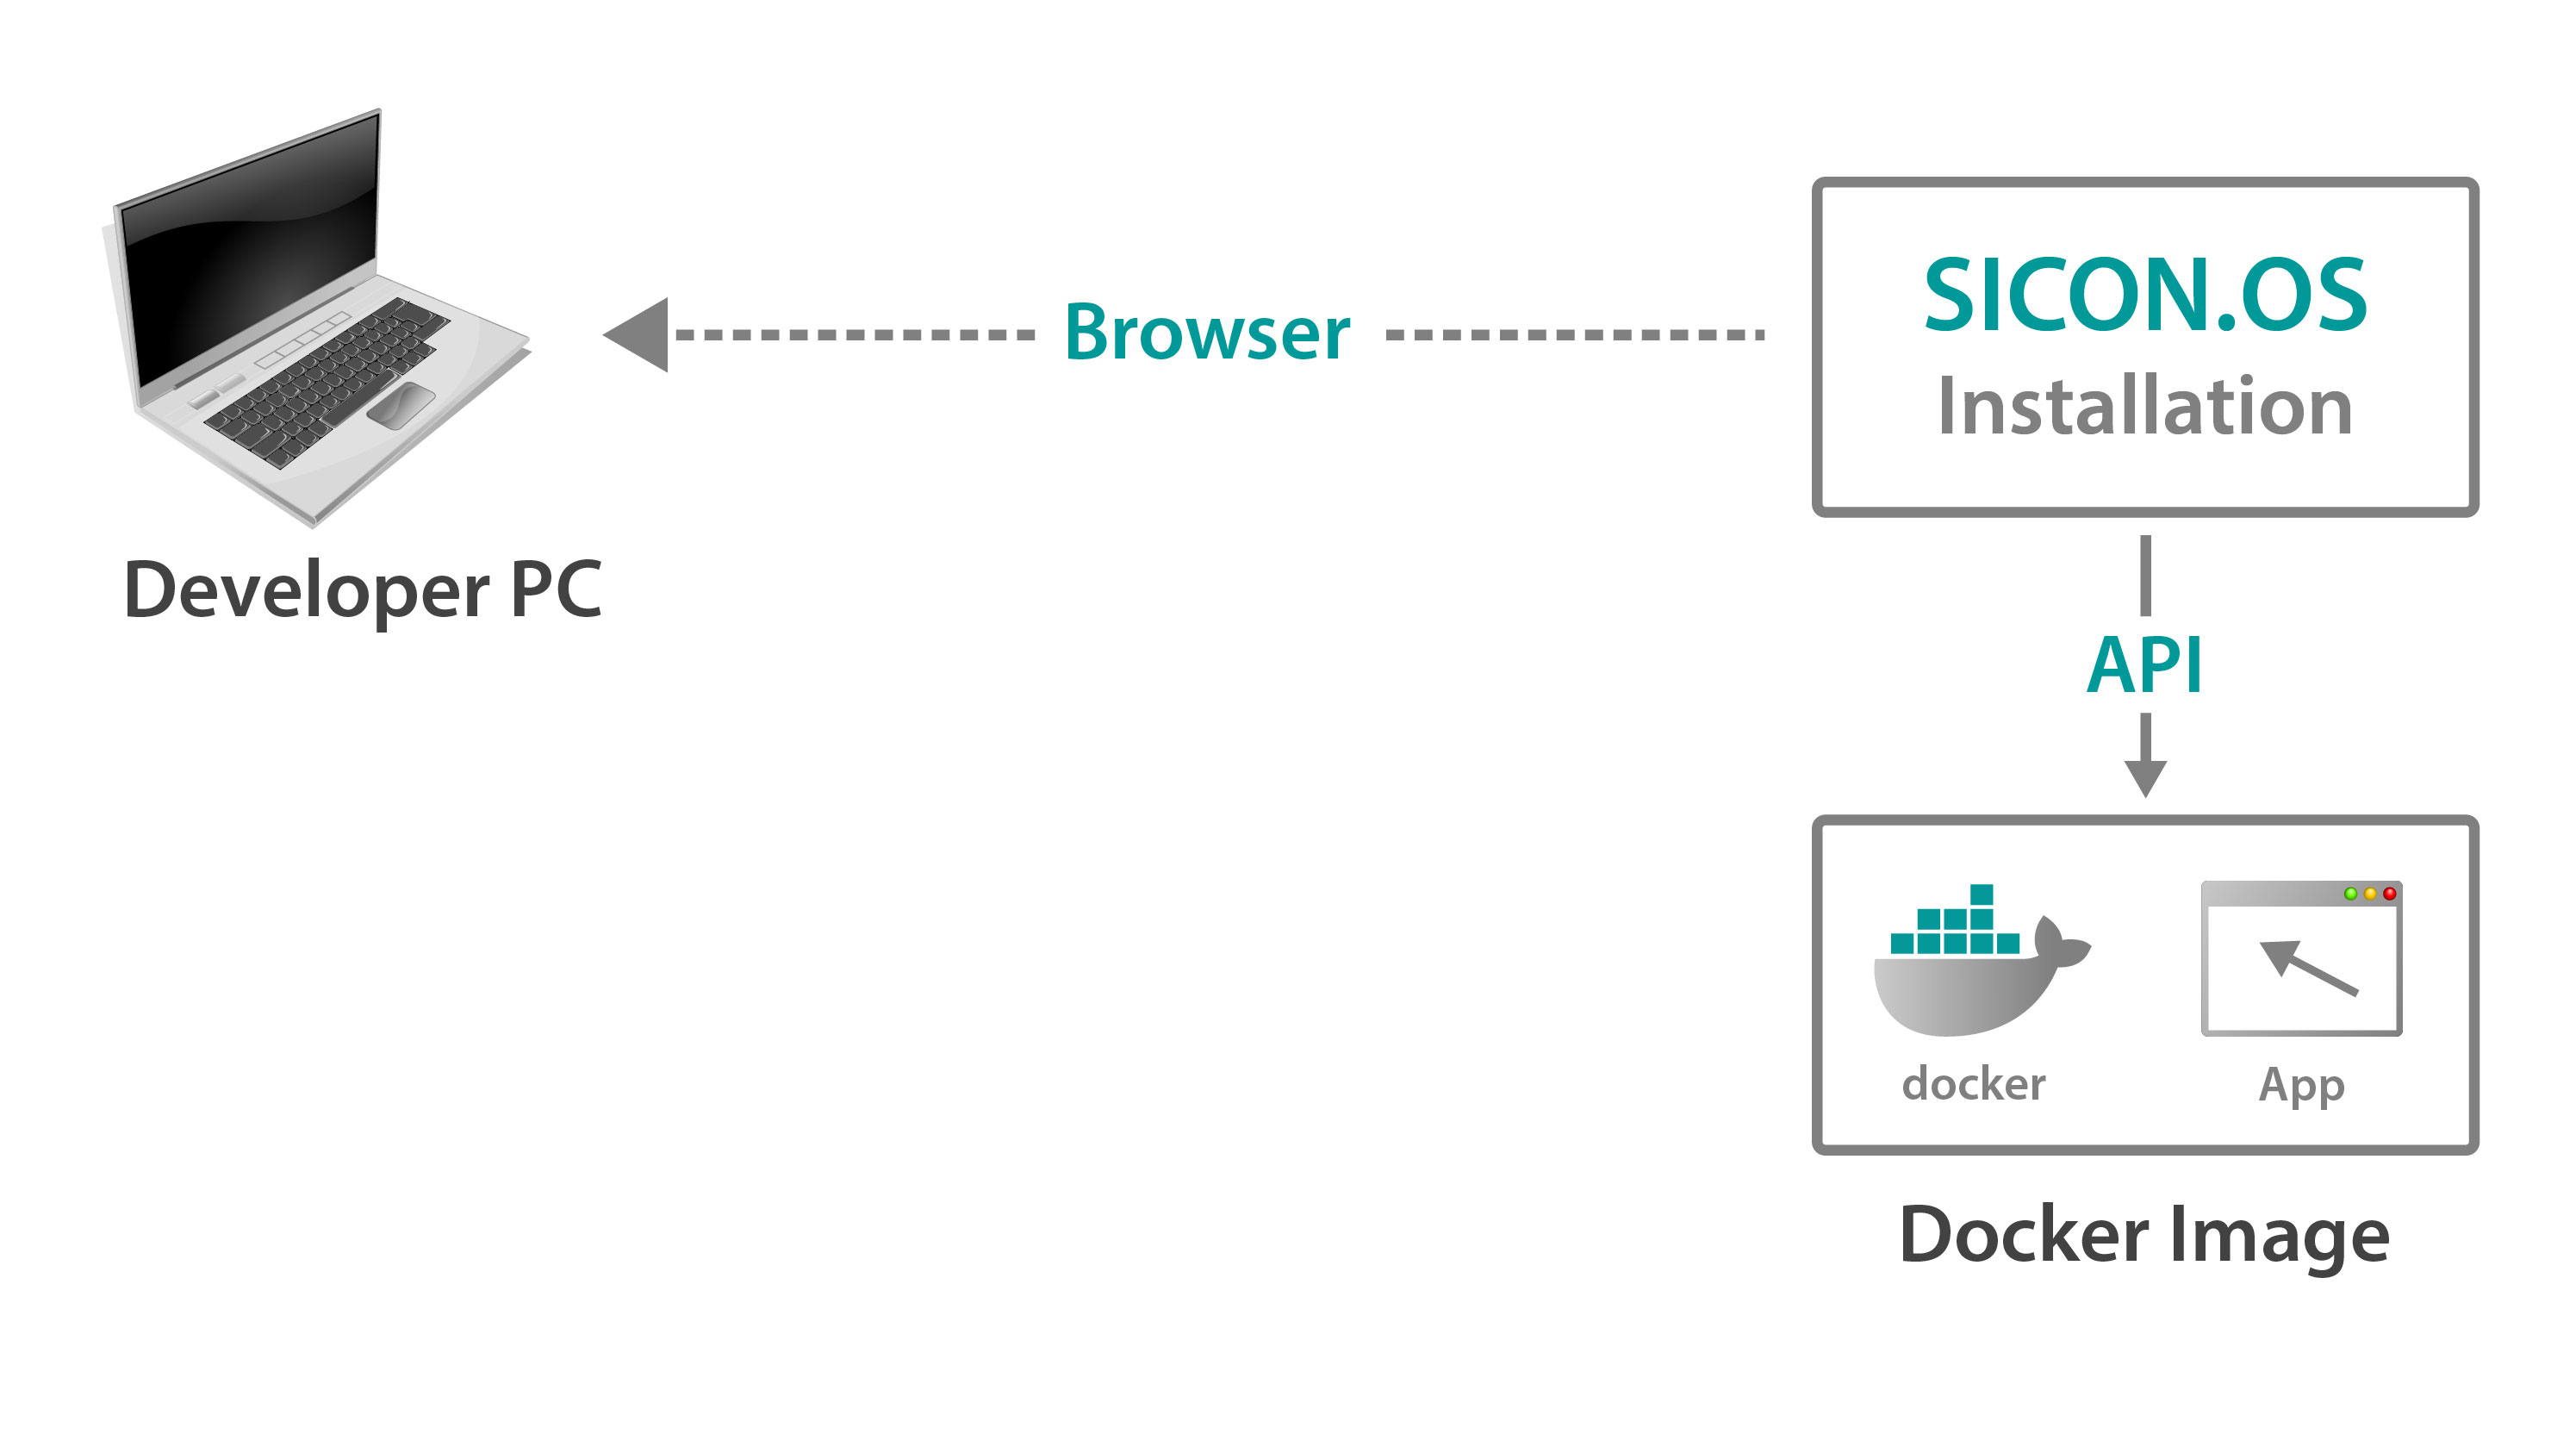
The goal of this step, is to prepare your App to run inside SICON.OS.
Secondly, you will be able to package your App as Docker image.
And then, finally you can upload it to your local SICON.OS installation for testing.
Overview
1. Download and install Docker Desktop for your machine
see https://www.docker.com/products/docker-desktop/
2. Create docker files to prepare build and run instructions
The official docker documentation explain very well what is required to build and run a container. We provide you with the bare minimum required files required to create a docker application.
In the example below we are using NodeJs 16 as demo application.
Dockerfile - used for instructions to build and run containers
FROM node:16-alpine
RUN npm i -g serve concurrently

WORKDIR /opt/acme/event-monitoring
COPY ./package*.json ./
RUN npm install
COPY ./ ./
RUN npm run build
RUN rm -r src node_modules
EXPOSE 80

CMD npm start
.dockerignore - used to prevent sending big files to the build context
node_modules
dist
build
docker-compose.yml - used to make repeated builds easier
version: '3'

services:
  eventmonitoring:
    build:
      context: ../
      args:
        - TAG=${TAG:-release}
    image: registry.service.sicon.eco/dev-acme/event-monitoring:${TAG:-release}
For test purposes, the vendor name is prefixed with dev- to prevent namespace collisions. Later when publishing your App, you can rename the vendor without the prefix.
3. Prepare your App to run as container
Relative Paths for Files
Once deployed, your App will run on the path /apps/<vendor>/<appName>/.
For example: https://siconos-2039.local/apps/dev-acme/event-monitoring/.
Your App is also served on /server/<vendor>/<appName>/ completely without SICON.OS sidebar and login.
This requires your App to reference its files from a relative path or include the full path.
For React apps, this can be configured in the package.json's homepage field. See create-react-app documentation.
Common pitfalls: Please always load your App with a trailing slash when using relative paths. The browser always loads relative to the last slash in the URL path. If you open your App on https://siconos-2039.local/apps/dev-acme/event-monitoring, but load your assets like javascript and css files with relative paths, this will lead to problems. As the final path will be https://siconos-2039.local/apps/dev-acme/style.css instead of https://siconos-2039.local/apps/dev-acme/event-monitoring/style.css.
Relative Paths for API Access
Accessing the API also has to account for the relative path from your client-side app.
You can use the following script from your front-end to retrieve the path for the REST API:
const APIBASEURL = `${location.origin}/api/v1`Create a server and open the ports
If your App only consists of static files (html, css, js, etc…), then you need a static server that can host these files inside your docker container.
Most frameworks already include a web server. With a command like npm run server or npm start your App can run inside the docker container. Check the relevant documentation to configure the port.
Please do not provide HTTPS or your own SSL certificate. SICON.OS will automatically use its own certificate for serving your App on HTTPS.
By default, we use port 80 HTTP of the container to redirect your application to its app path (e.g.: /apps/dev-acme/event-monitoring)
This requires the following addition in your Dockerfile:
EXPOSE 80Runtime Settings
The run settings are a JSON object that instructs the docker engine to create your container. Settings like additional environment variables, reverse proxy instructions and volumes can be configured here. Please refer to the official docker documentation for possible fields.
For security reasons, we disallow changing the following HostConfig fields:
Links
Privileged
NetworkMode
SecurityOpt
StorageOpt
CgroupParent
VolumeDriver
Examples
Running and providing two servers
If you can’t configure the port or want to provide multiple Servers, you can add a load balance rule to the “Labels” object.
We use Traefik as reverse proxy to configure paths and HTTPS.
{
	"Labels": {
		"traefik.http.services.eventmonitoring_client.loadbalancer.server.port": "80",
		"traefik.http.routers.eventmonitoring_client_http.service": "eventmonitoring_client",
		"traefik.http.routers.eventmonitoring_client_https.service": "eventmonitoring_client",
		"traefik.http.services.eventmonitoring_server.loadbalancer.server.port": "5001",
		"traefik.http.middlewares.eventmonitoring_server.stripprefix.prefixes": "/server/dev-acme/event-monitoring",
		"traefik.http.routers.eventmonitoring_server_http.entrypoints": "http",
		"traefik.http.routers.eventmonitoring_server_http.service": "eventmonitoring_server",
		"traefik.http.routers.eventmonitoring_server_http.middlewares": "eventmonitoring_server@docker",
		"traefik.http.routers.eventmonitoring_server_http.rule": "PathPrefix(`/server/dev-acme/event-monitoring`)",
		"traefik.http.routers.eventmonitoring_server_https.entrypoints": "https",
		"traefik.http.routers.eventmonitoring_server_https.service": "eventmonitoring_server",
		"traefik.http.routers.eventmonitoring_server_https.rule": "PathPrefix(`/server/dev-acme/event-monitoring`)",
		"traefik.http.routers.eventmonitoring_server_https.middlewares": "eventmonitoring_server@docker",
		"traefik.http.routers.eventmonitoring_server_https.tls": "true"
	}
}
Inside your Dockerfile you can use tools like concurrently to run two commands from one command.
RUN npm i -g concurrently
EXPOSE 80
EXPOSE 5001
CMD concurrently "serve client/build -l tcp:0.0.0.0:80" "python3 server/main.py"
Providing a service on a raw port
If you want to provide an additional protocol like OPCUA or RPC that can’t use URL paths, we allow you to provide a service through a raw port.
You can add the following to your runSettings object.
{
	"HostConfig": {
		"PortBindings": {
			"1337/tcp": [
				{
					"HostPort": "1337"
				}
			]
		}
	}
}
Persisting data inside a volume
You can use docker volumes to persist data between container updates. Add the following object to your runsettings field.
{
    "Volumes": {
        "/opt/acme/event-monitoring/data": { }
    }
}
Server side Authentication and API Access
Until now, your app was only available with a fixed IP address and API key (JWT token).
To enable your app to run from anywhere, we provide environment variables to every running docker container.
APIBASEURL=http://sicon_backend:1881- provides access to the REST APIMQTT_HOST=sicon_mqttMQTT_PORT=1883
If you are creating a NodeJS backend app, you can access the environment variable from the process.env. object.
3. Build your Docker image
With the prepared docker files, building the docker image is easy:
docker-compose buildIf you want to build for a different version channel, you can use an environment variable or change the compose file.
To build on Linux:
TAG=beta docker-compose buildTo build on Windows:
cmd /V /C "set TAG=beta && docker-compose build"Be aware of your architecture
While you can build a linux docker image on a windows machine, you cannot cross-compile for different architectures. Building on a Raspberry PI (using arm v7) will not be usable on a SICON.OS machine (using x86_64)
4. Export your docker image
Run the following command to export your docker image to a .tar archive.
docker save registry.service.sicon.eco/dev-acme/event-monitoring:beta -o event-monitoring-beta.tarThis can be later uploaded through SICON.OS
5. Import your docker image archive
In your SICON.OS installation, log In as admin and navigate to:
System Settings → My Apps → Installed Apps.
Click on “Create new App for development” to open the dialog.

2. Fill out the form.
Vendor is the namespace where all apps belong to; this can be your company name for example
Container Name is the name displayed in the sidebar
Icon can be chosen from a preset of material icons
Docker Run Settings are explained in above section
Docker Image Archive is where you can upload your .tar file
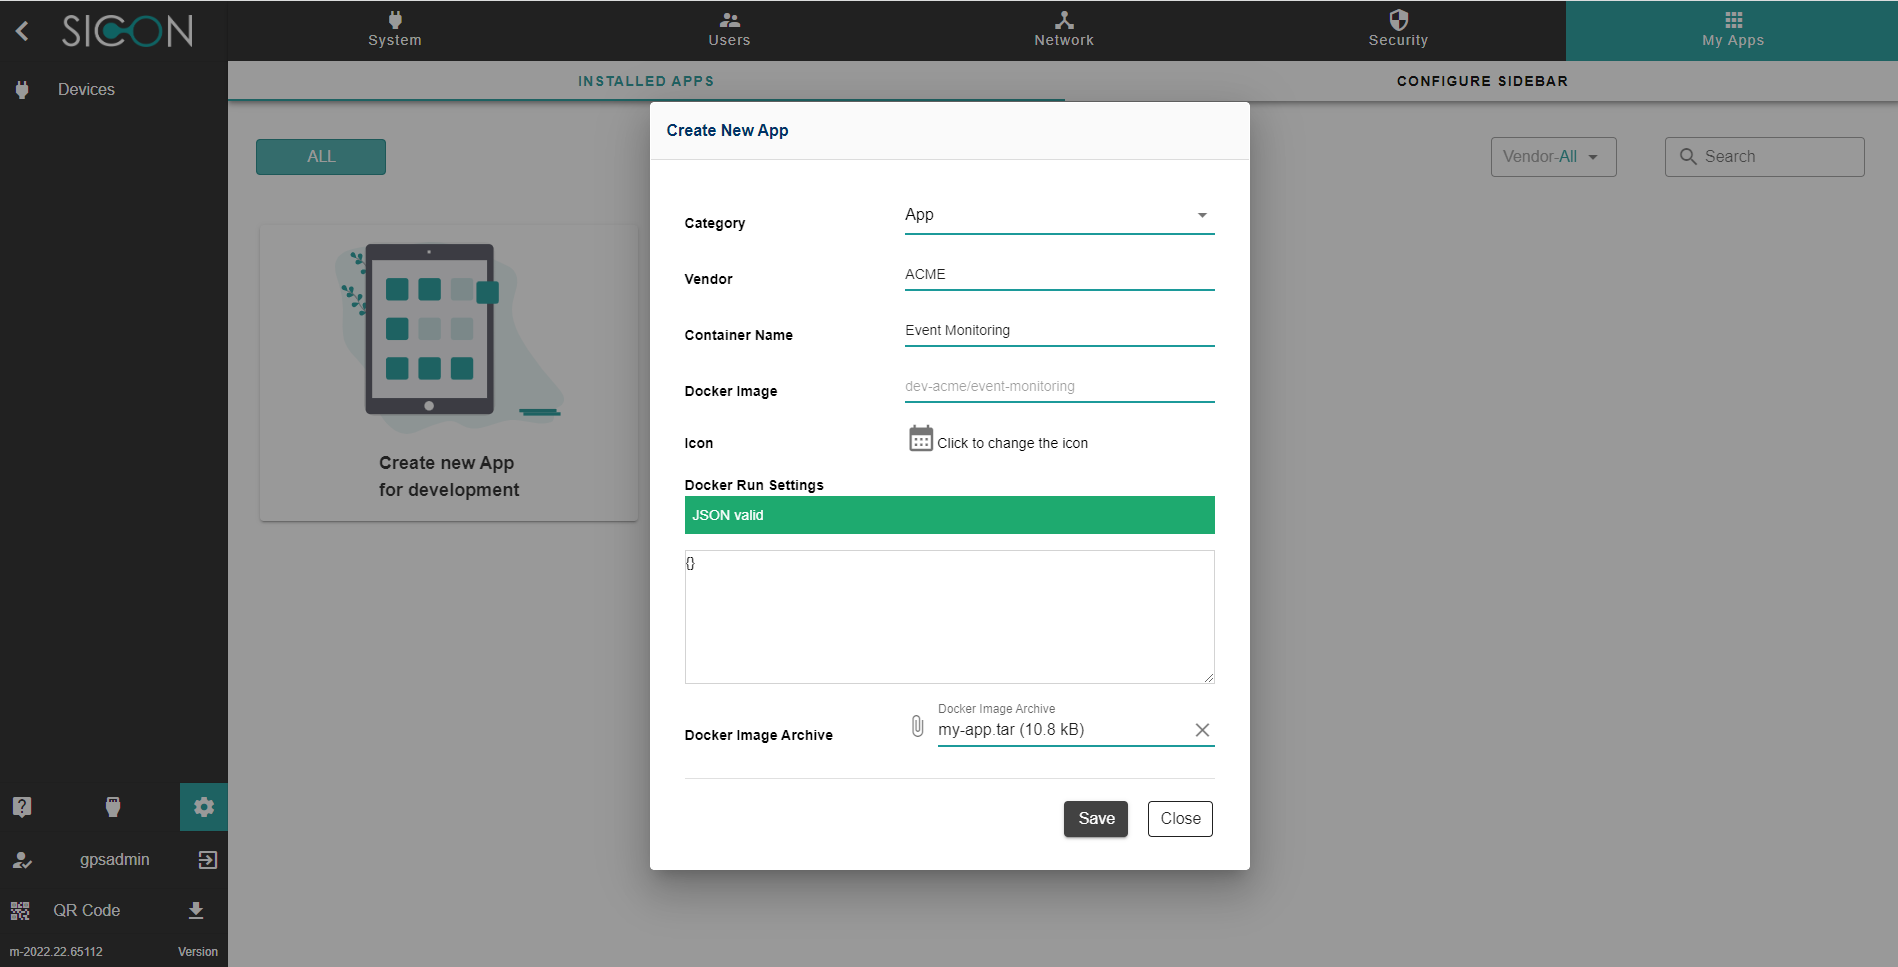
Click “Save” and your App gets created. Depending on the size of your App and network bandwidth, this might take a few minutes.
The upload supports apps with a maximum size of 2 GB.
Once done, your App will be added to the sidebar.