
GraphQL is an open source query language that describes how a client should request information through an APIs (Application Programming Interfaces). It empowers clients to efficiently request and retrieve precisely the data they need from a server.
Unlike traditional RESTful APIs, which often provide fixed and inflexible data structures, GraphQL allows clients to define their data requirements, specifying the exact fields and relationships they want, all in a single, flexible request.
Prerequisites / Requirements –
-
We are using Apollo for interacting with GraphQL
-
GraphlQL server is hosted on device cloud server
Steps to check and use GraphQL in project :-
-
Go to Device cloud server
-
Click on settings button on top left and set the headers with the values
-
Authorization
-
Key
-
-
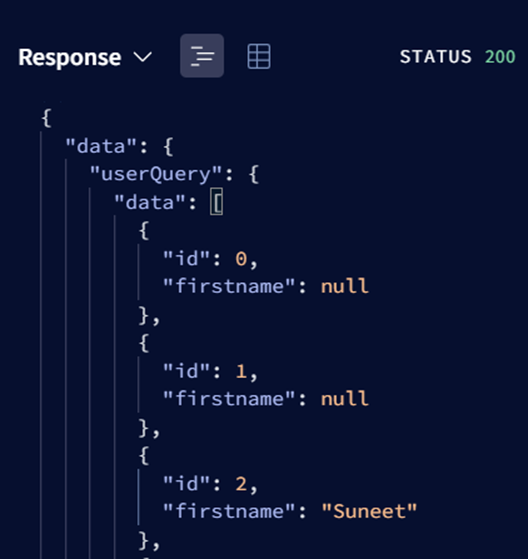
Try this query to see if it is working or not
query UserQuery {
  userQuery {
    data {
      id
      firstname
    }
  }
}
-
Look for output
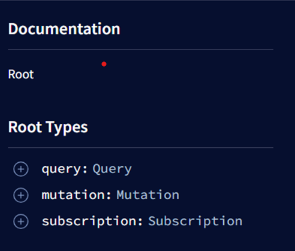
In Apollo, we have three possibilities of interacting with data :-
-
Query
-
Mutation
-
Subscription
In the code :-
-
Install npm packages
-
nuxt/apollo
-
graphql-tag
-
Go to constants.js file and add GraphQL URL
-
Create apollo.js file in root directory and add Client configuration, Authentication information
import { GRAPHQL_URL, GRAPHQL_WS } from './constants.js';

export default {
            clientConfigs: {
            default: {
              httpEndpoint: GRAPHQL_URL,
              tokenName: 'token-name',
              persisting: false,
            },
          },
          authenticationType: 'autenticate-type',
          tokenName: 'token-name',
          includeNodeModules: true,
        }
-
Create a folder in root as per requirement
-
apollo/queries
-
apollo/subscriptions
-
Create a file under queries folder, for example - devices.gql and paster graphlQL code in it.
query DeviceInstanceQuery {
  deviceInstanceQuery {
    data {
      id
      kpi
      name
    }
  }
}
6, Import the GraphQL query in whichever file we use it
import deviceInstanceQuery from '~/apollo/queries/devices/devices'
-
Use the query in the format below -
this.devices = (await this.$apollo.query({
                query: deviceInstanceQuery,
                variables: {
                            "deviceInstanceWhere": {
                                "regStatusId": {
                                "gt": 4
                                },
                                "hidden": false
                            }
                            }
                })).data.deviceInstanceQuery.data
-
Test the output of the query using console.log and we are done
Tip : Vuejs chrome extension can also be installed to debug the Vue components easily
Happy Coding 🙂