Setup SICON.Toolbox App
1.13 Setup via the SICON.Setup app
At the beginning of the setup process, your SICON.PLUG should pulse blue. If this is not the case, please RESET the device to its factory settings.
The pictures shown here are from an Android device. The setup via an IOS device is similar to this.
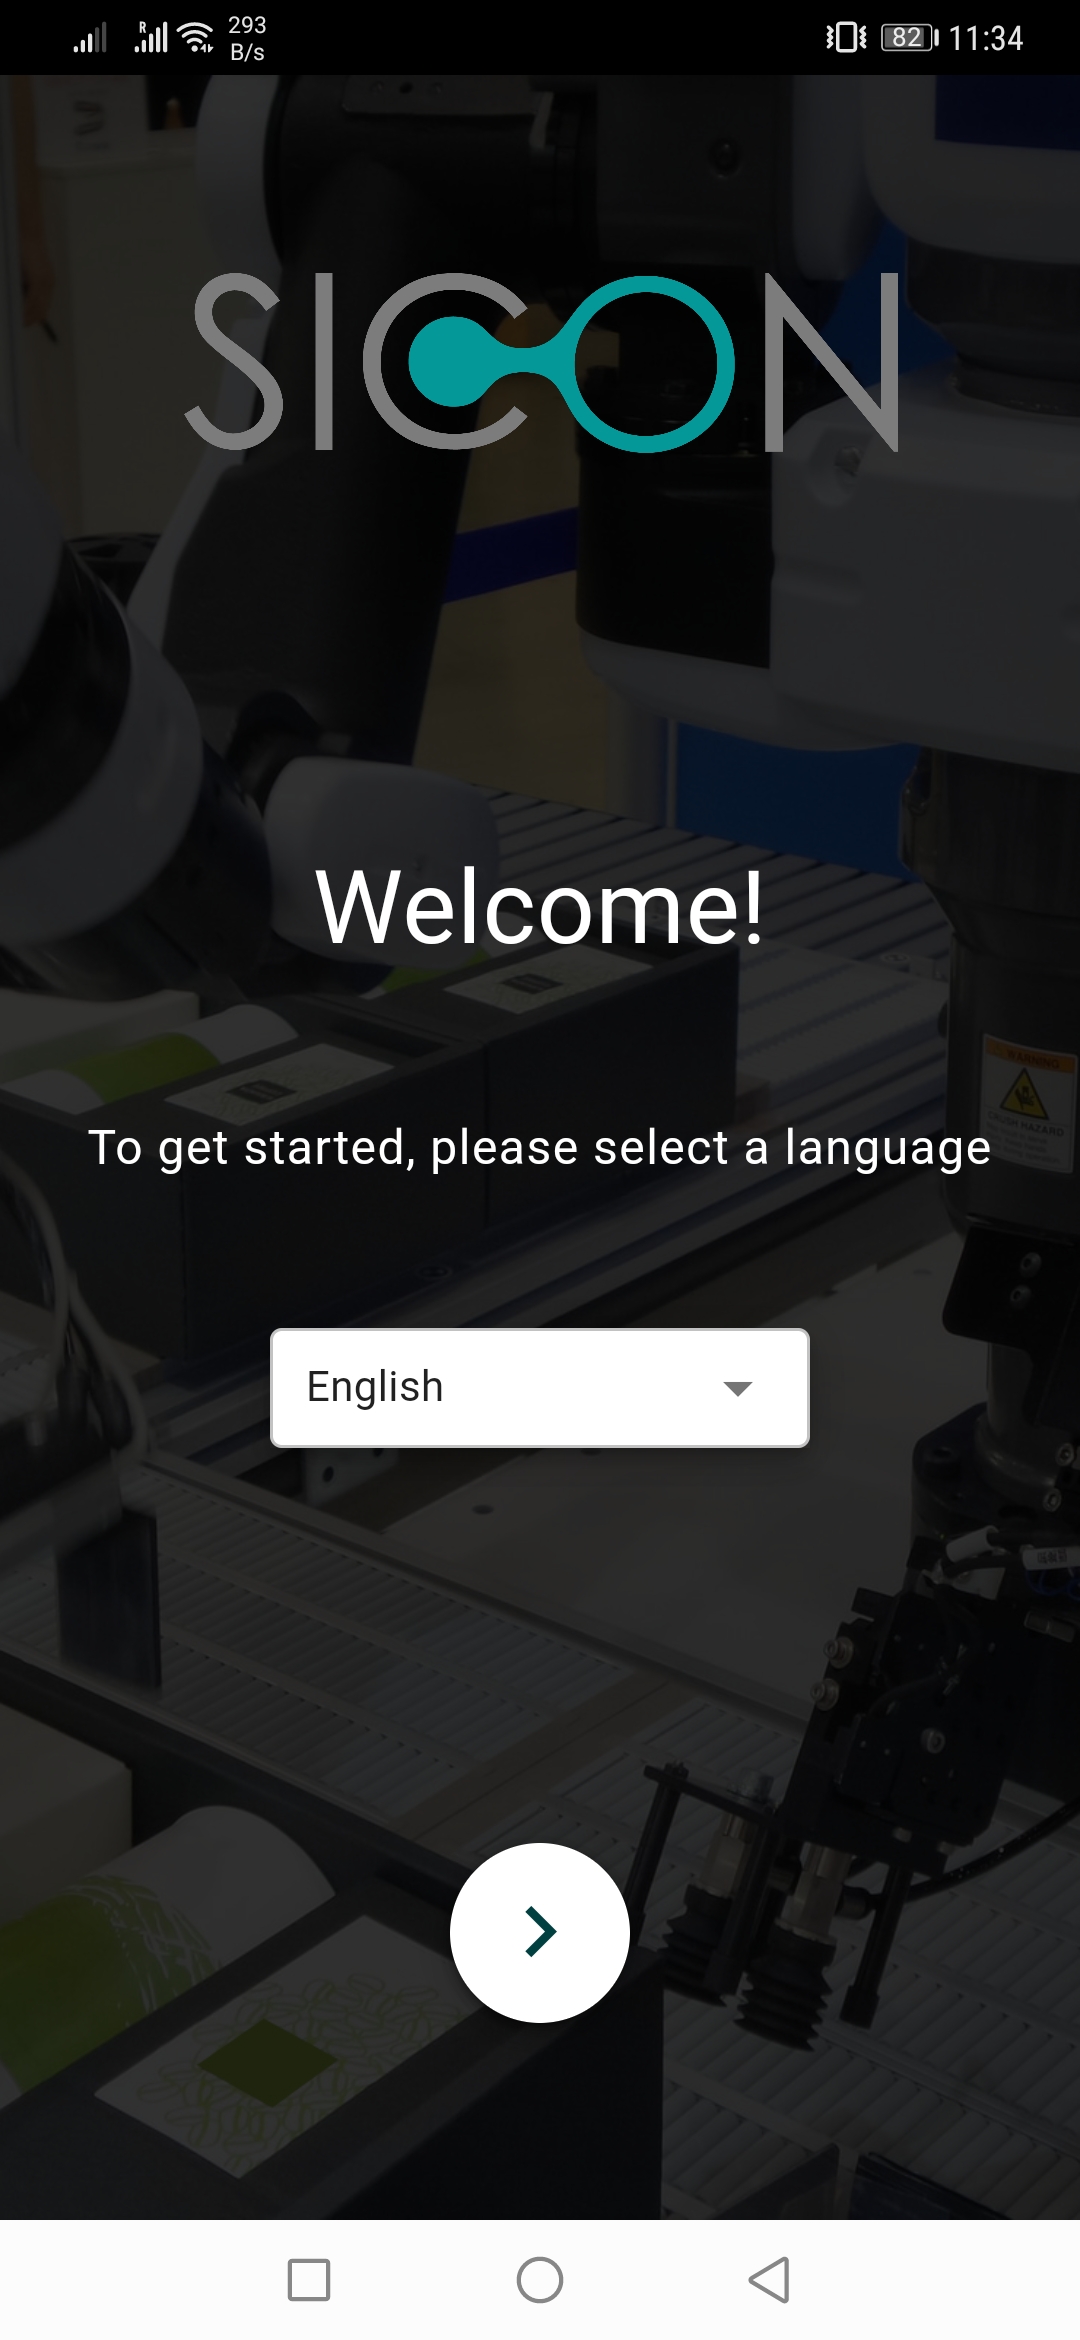
1. Download and install the SICON.Toolbox app for free from your Google play store or Apple app store.
2. Open the app and select your preferred language.
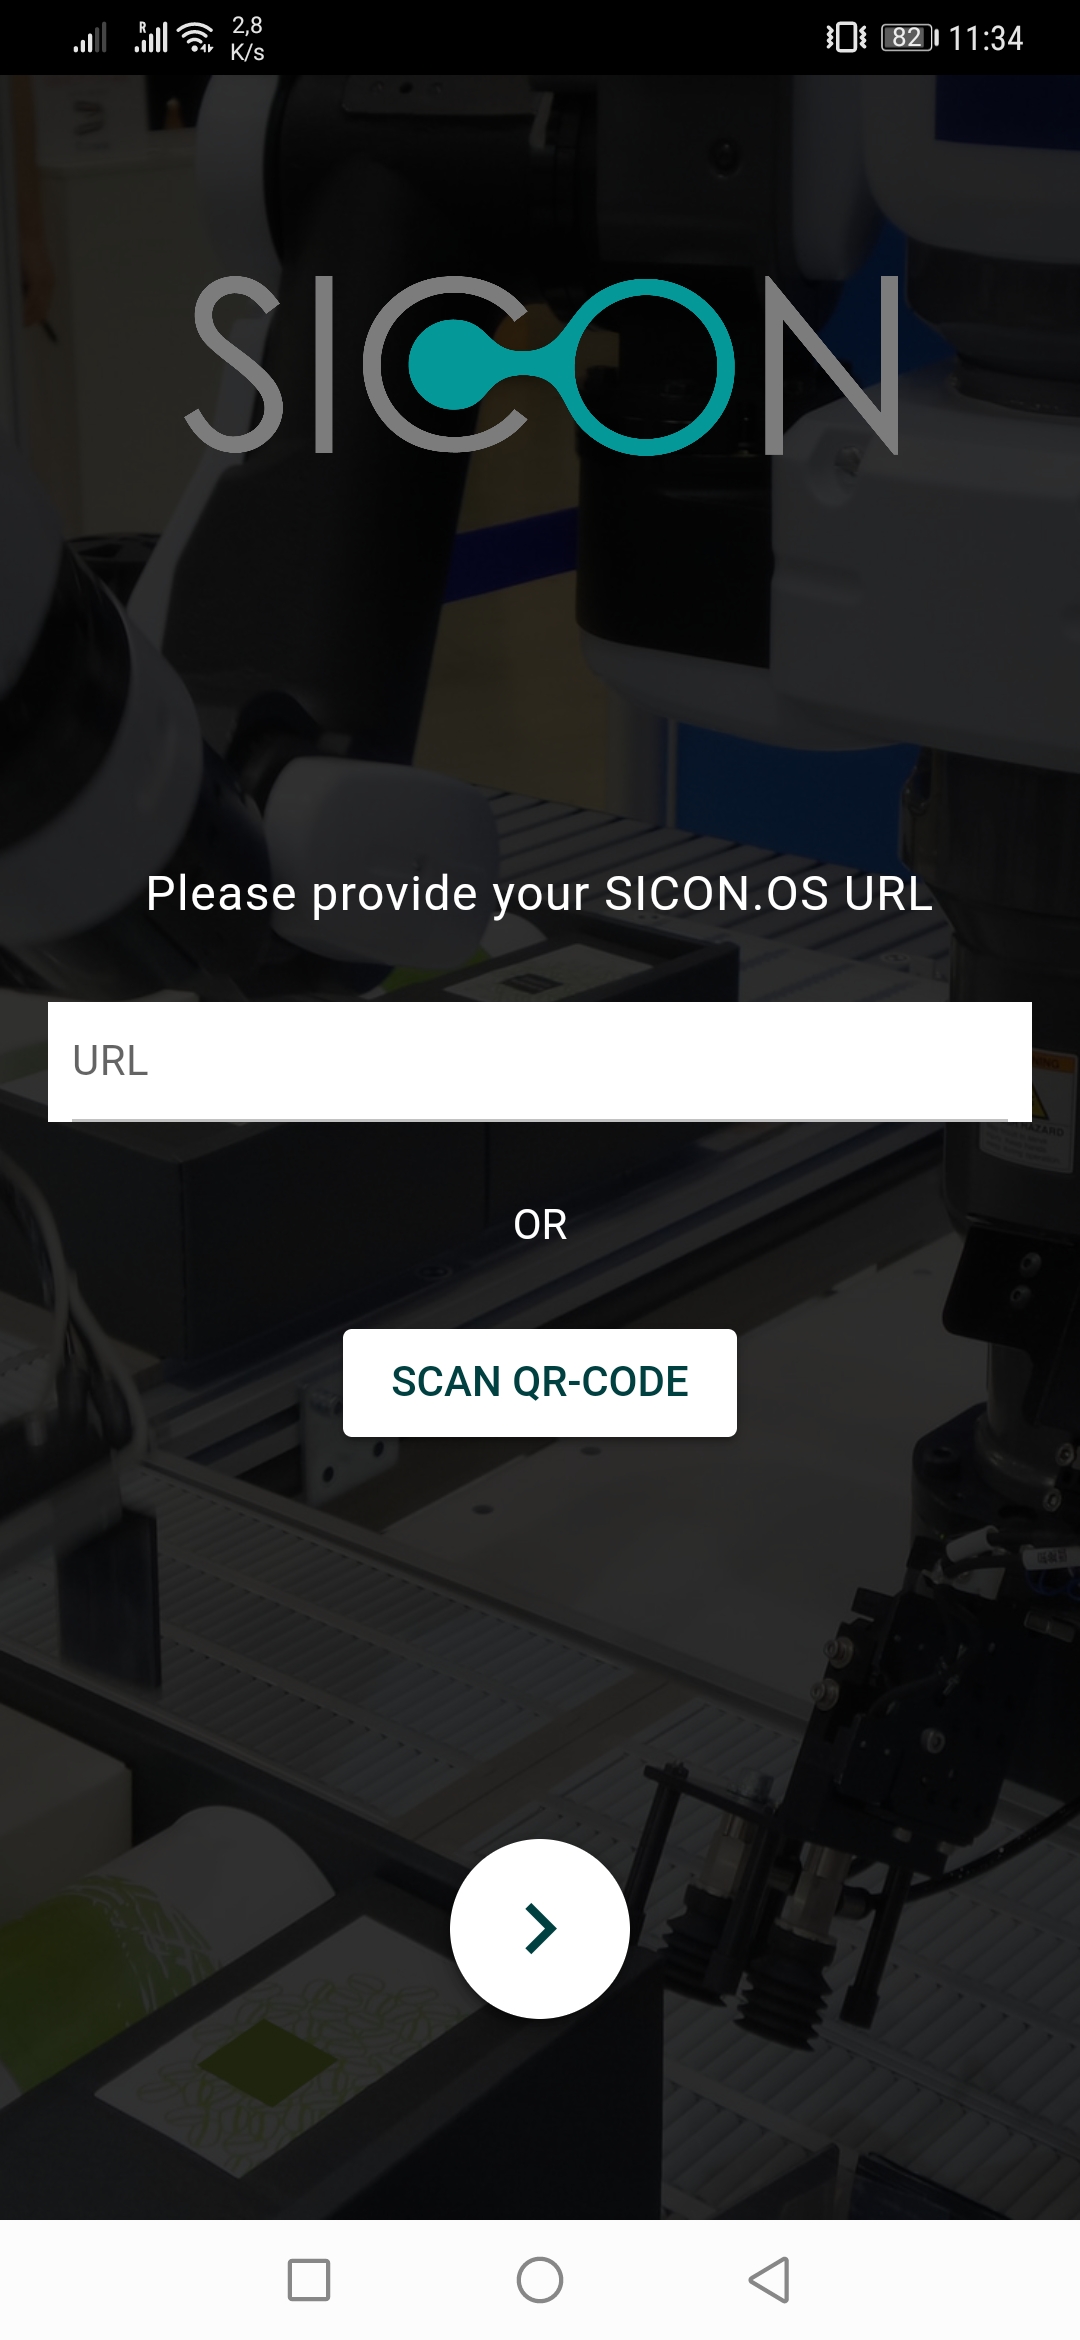
Make sure that your smartphone or tablet is on the same network as your SICON.OS box. If you have a SICON Cloud, please make sure that you have an internet connection.
3. Now enter the IP address or the URL of the SICON.OS box into the app or, if you have a cloud, the URL of the cloud or you can scan the QR-Code from the cloud.
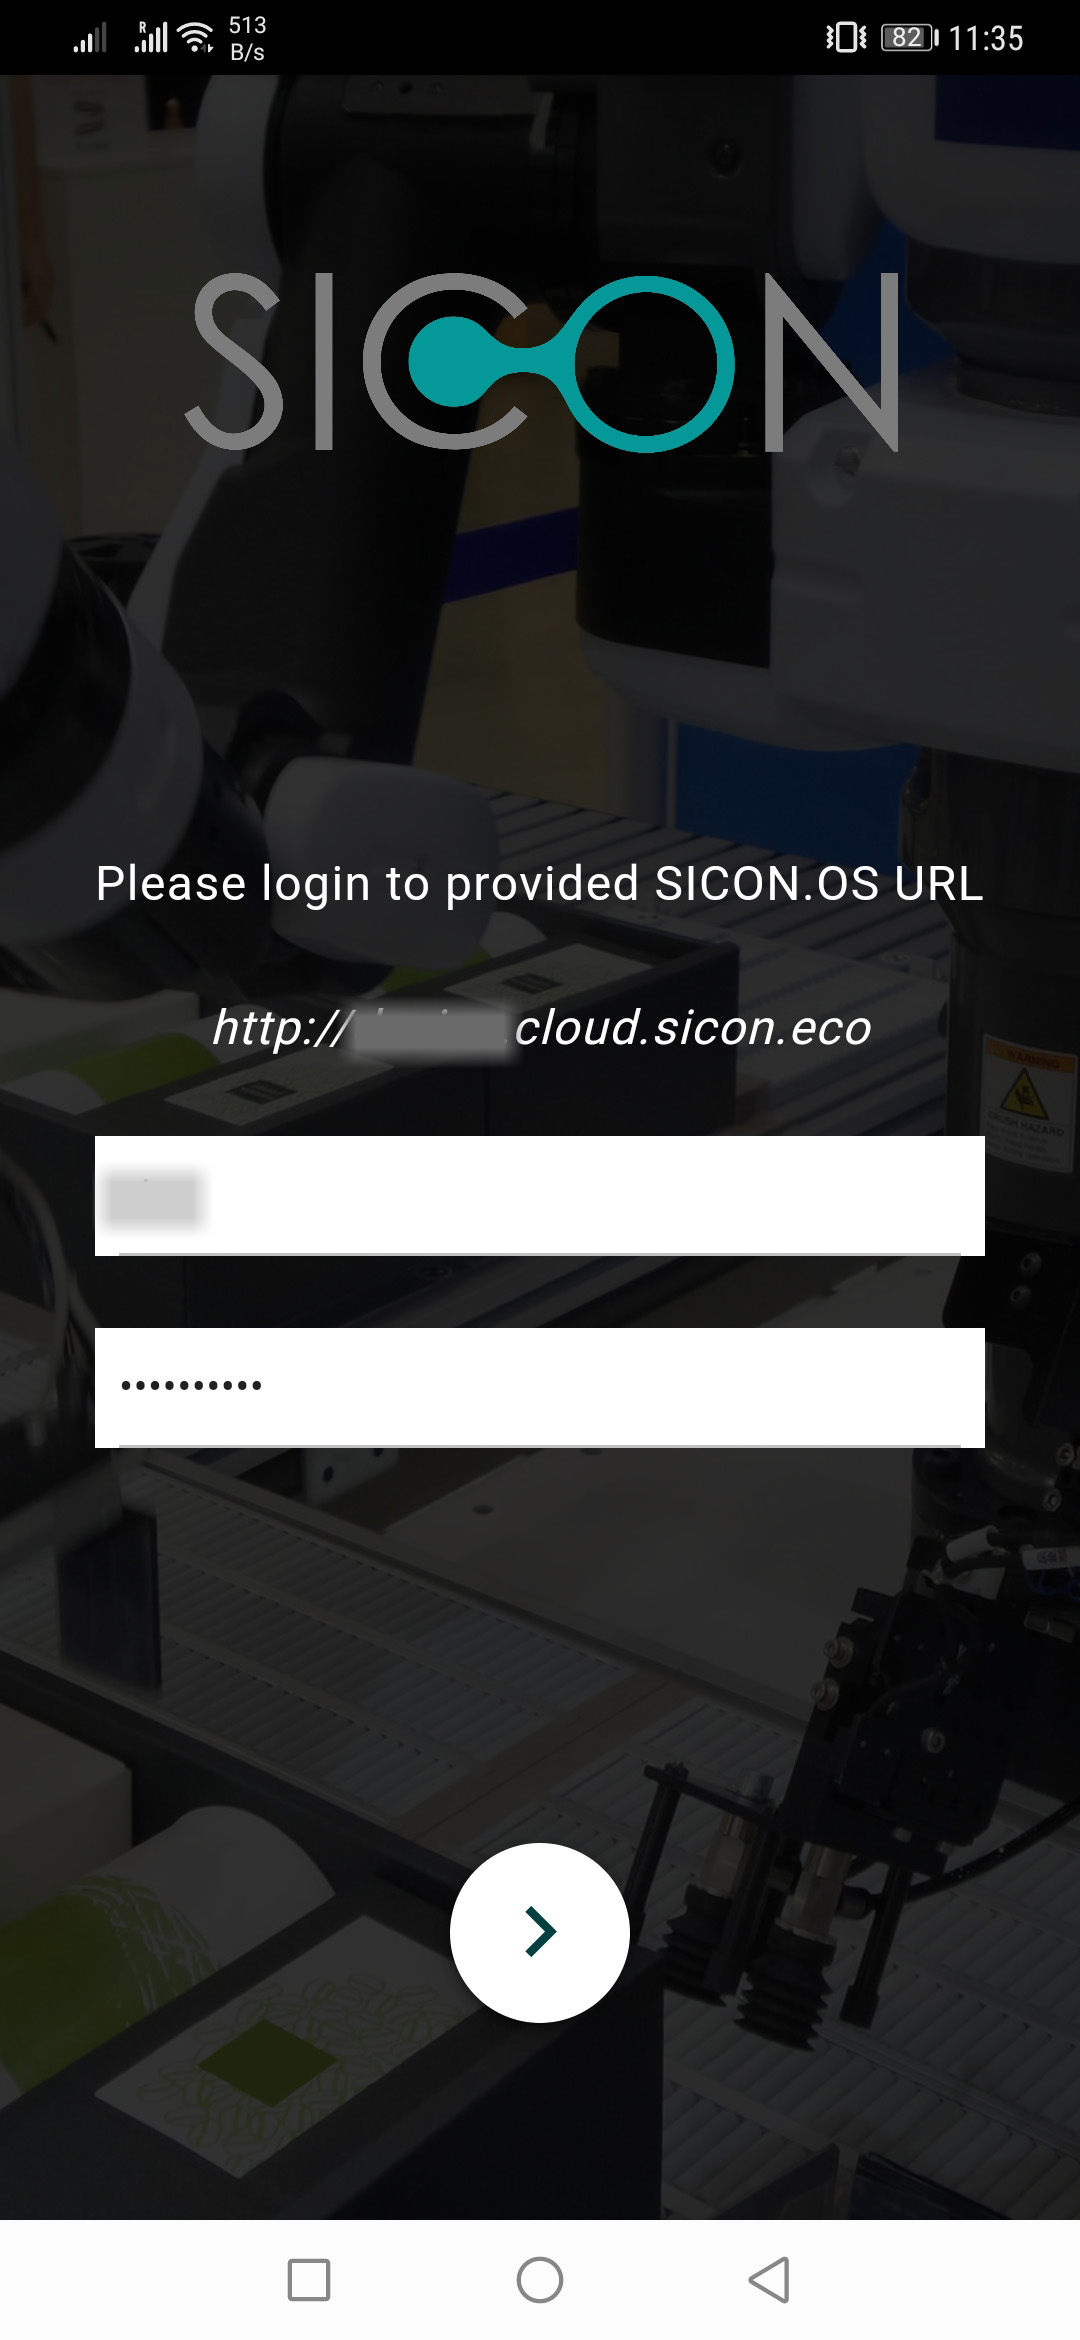
4. Next, you should be able to log in to SICON.OS with your respective user account.
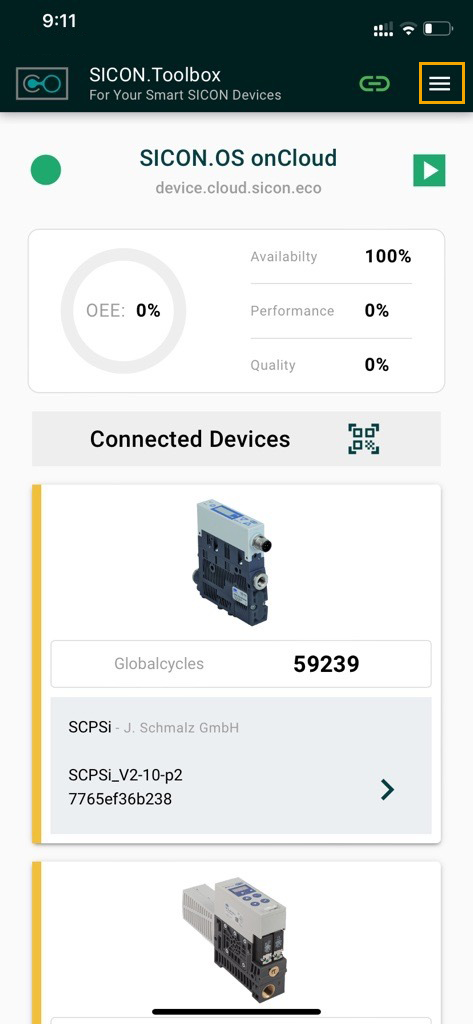
5. Welcome to the dashboard.
Here you will see the connected devices, disconnected devices, OEE performance data.
The green “Link”
 symbol show that the Toolbox app is connected to the SICON.OS
Go to the Hamburger menu to open the Side bar panel.
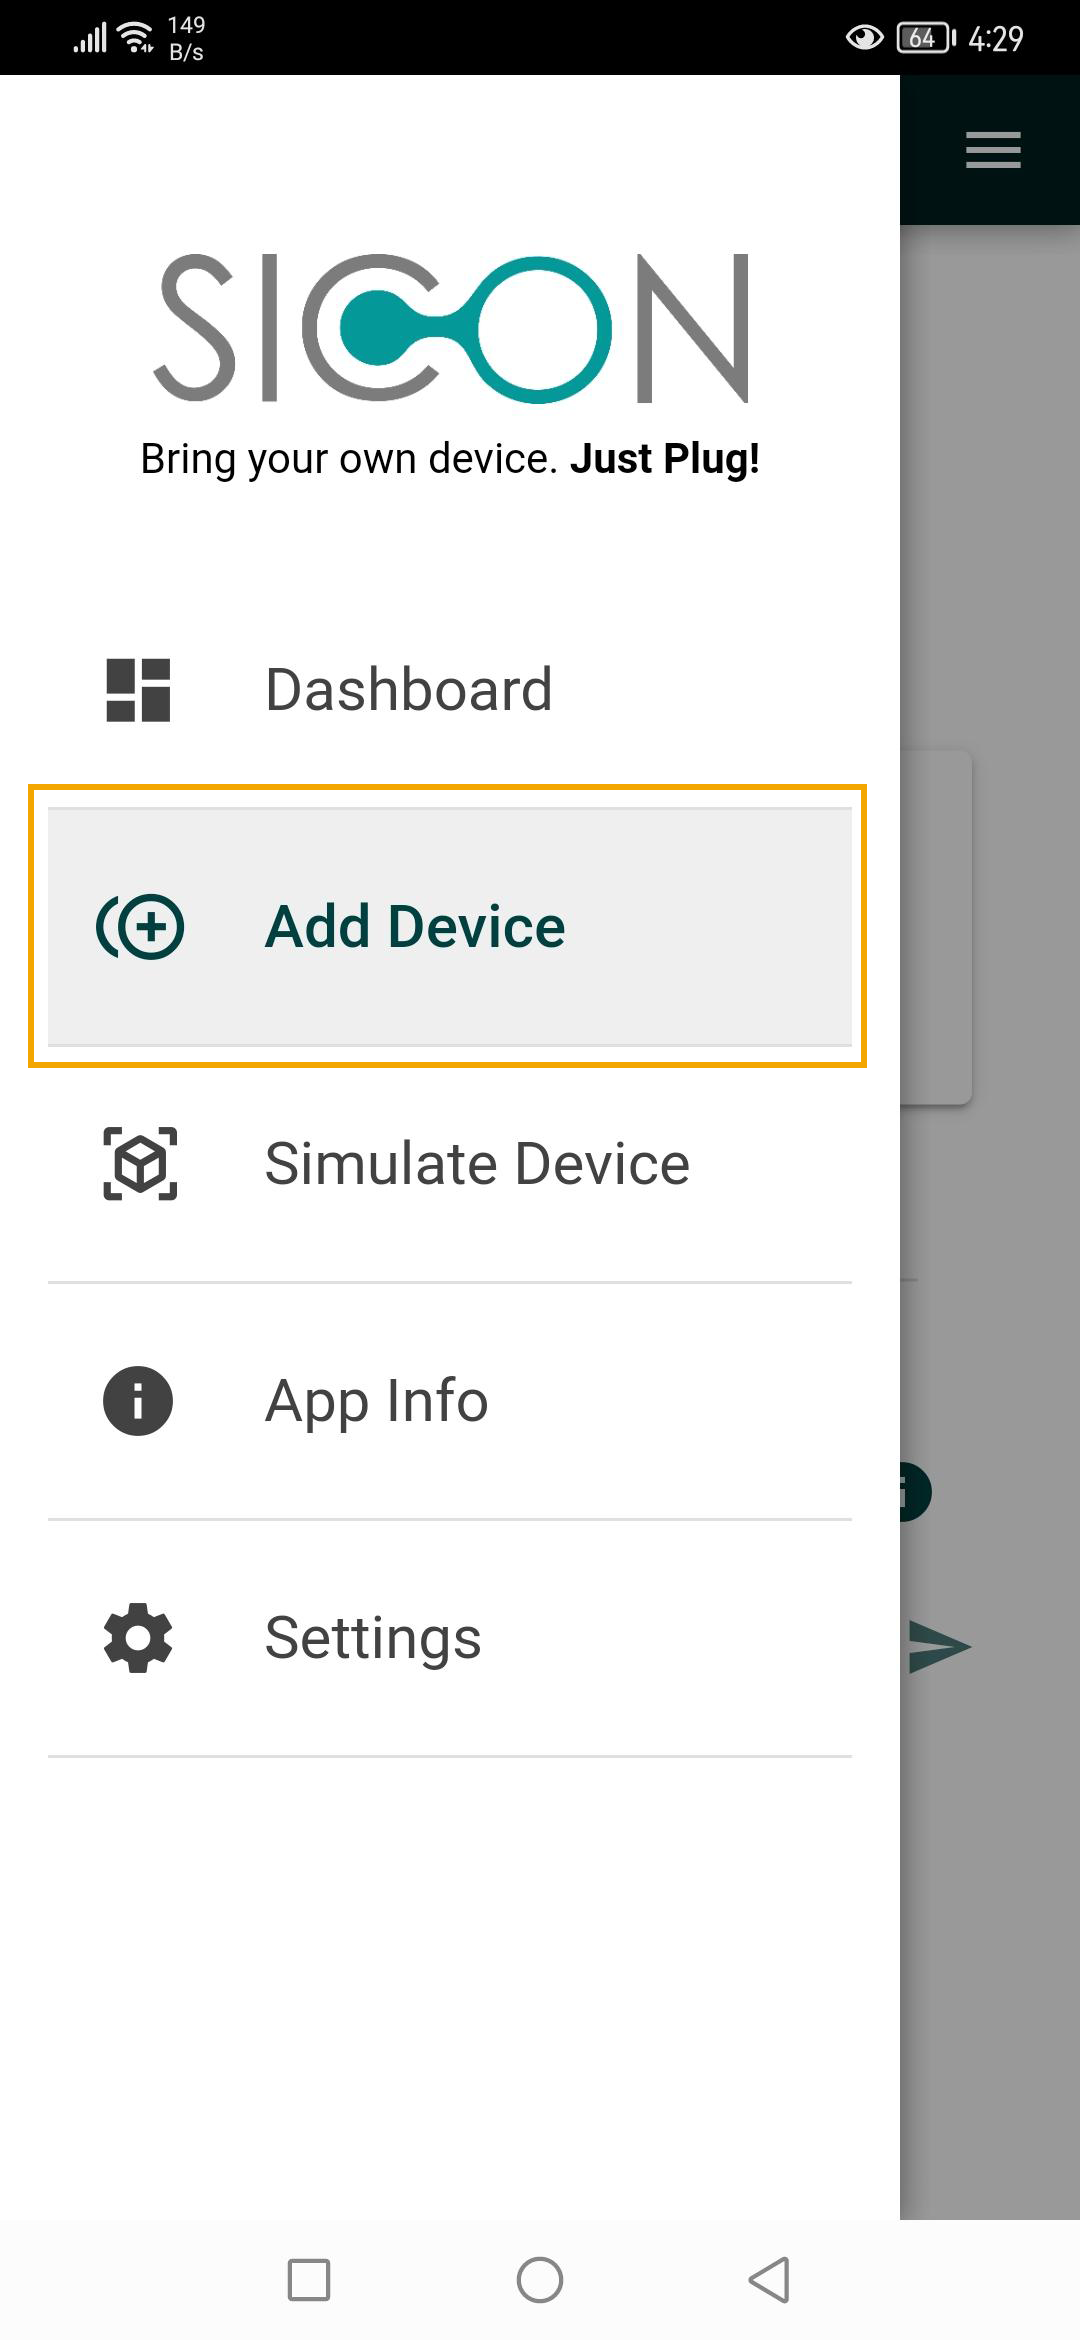
6. On the side bar panel, you will see the following menu:
Dashboard
Add device
Simulate device
App info
Settings
Click on ADD DEVICE.
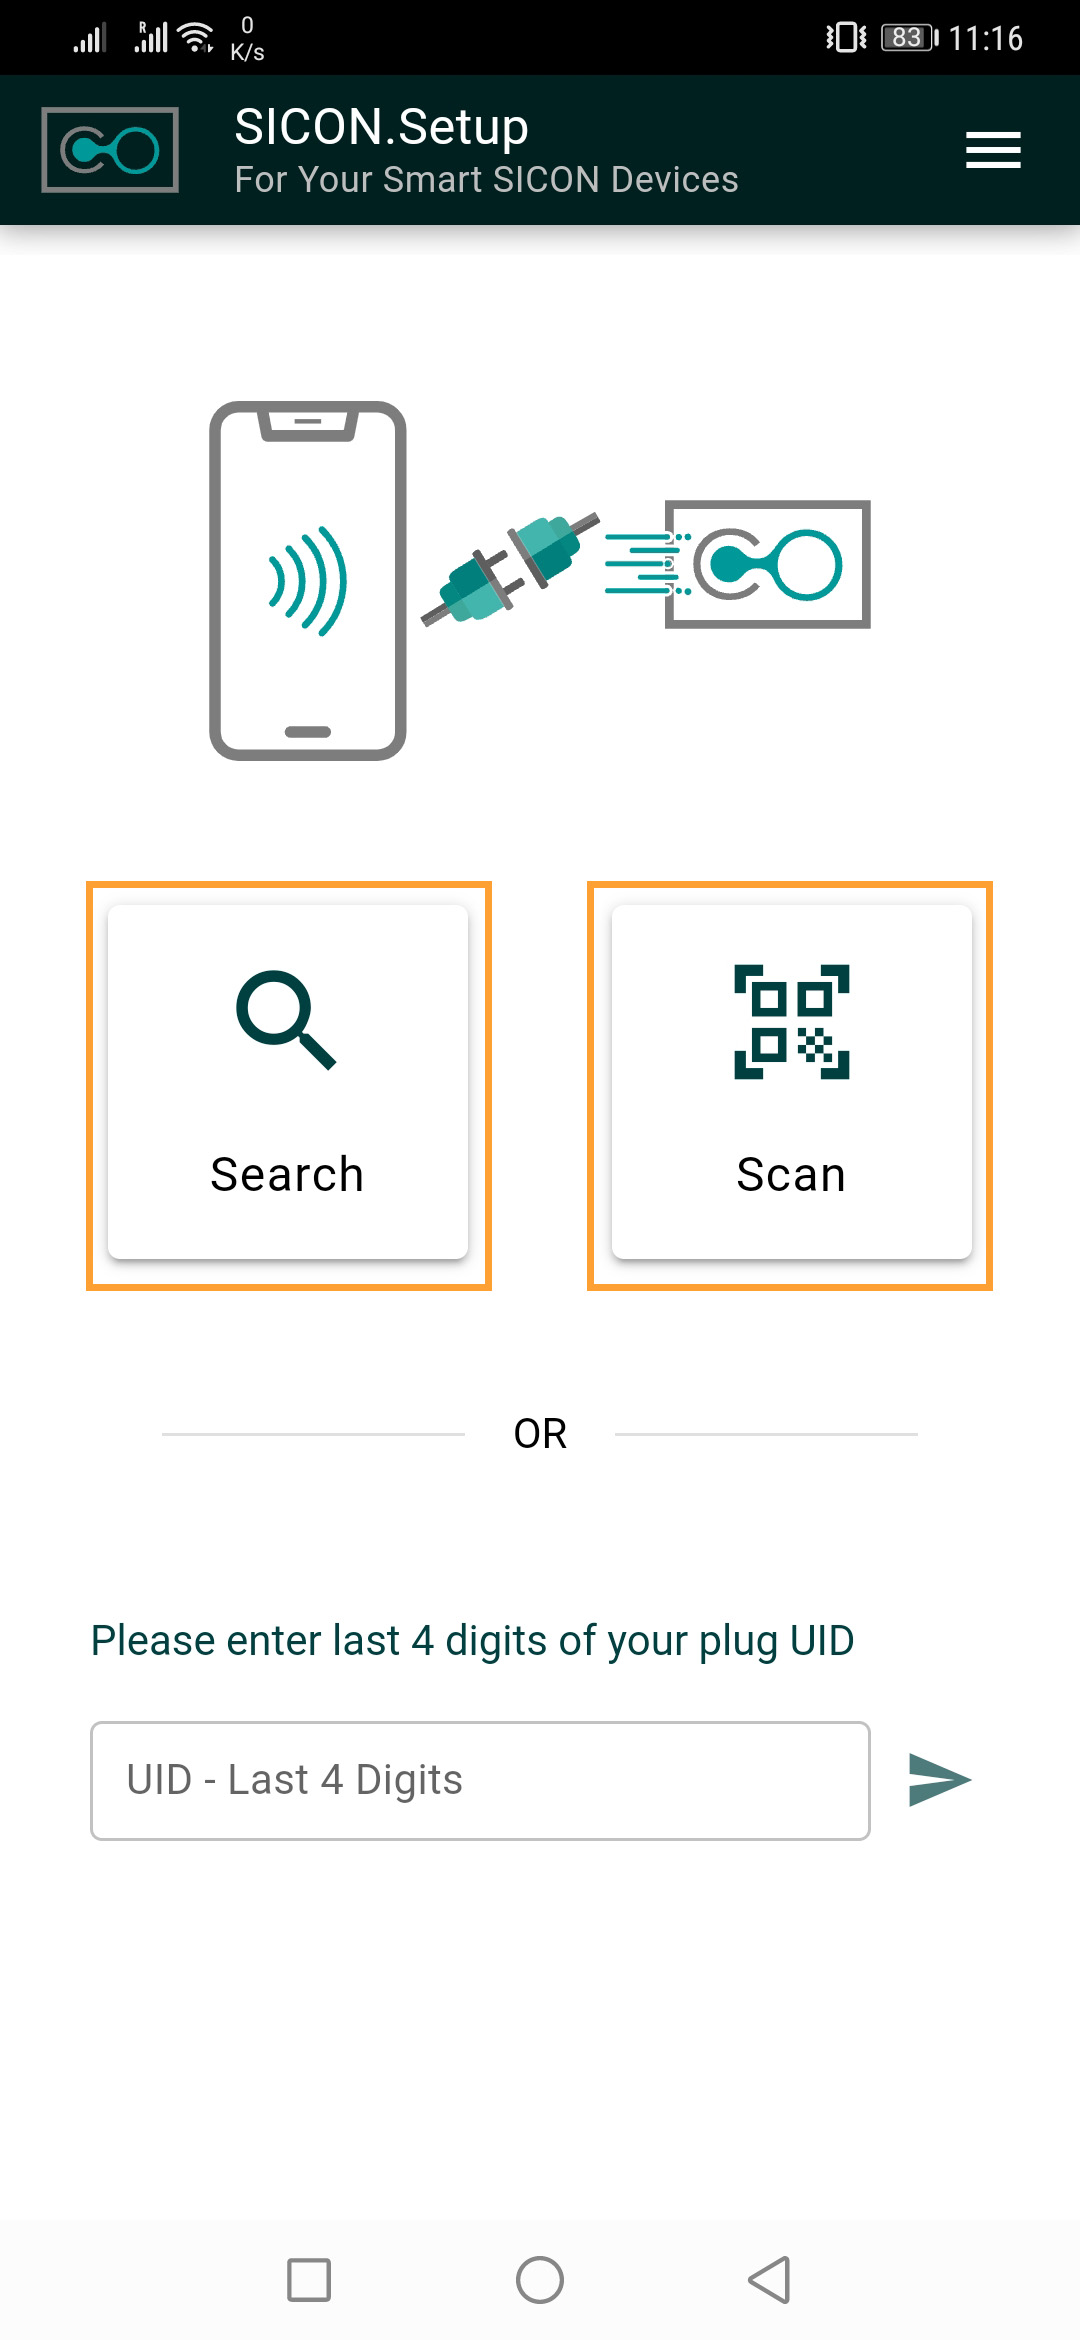
7. Now you have three options to start configuring the SICON.PLUG : Search, Scan and Manual entry.
For iOS, Search feature is not available.
Search → This option automatically finds the nearby Plugs.
Scan → With this option, you can scan the QR-Code which is located at the back of the Plug.
Manual → Here you have to enter the last 4 characters of the Plug UID which is located at the back of the Plug.
For Scan and Manual, please skip to step 7.
Example: Scan feature
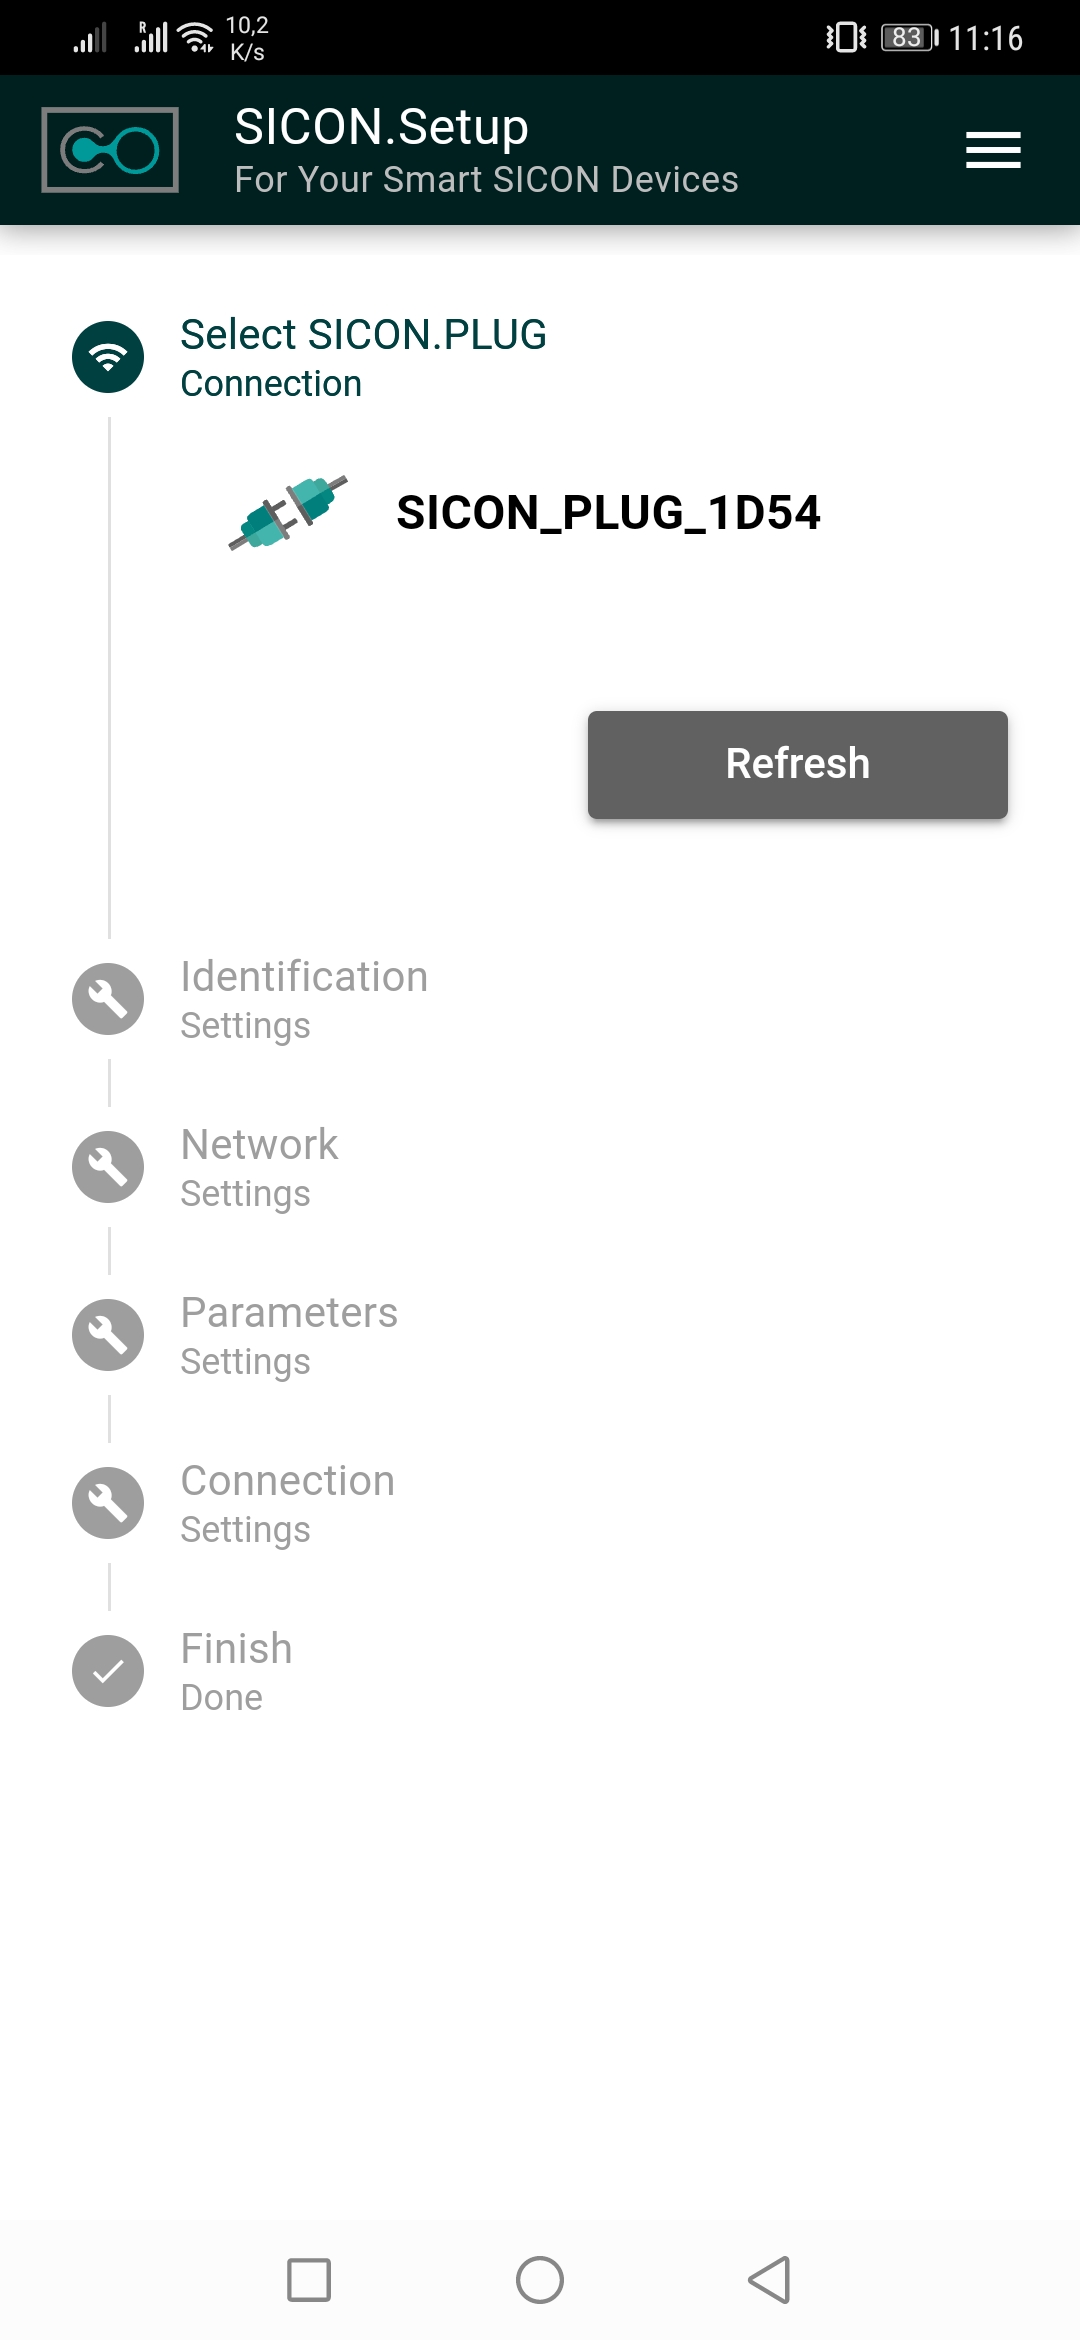
Now select the SICON.PLUG to be configured. If several devices are displayed, you can identify the correct SICON.PLUG via the label. Here you will find the Unique ID, which is unique worldwide. The last four characters of the unique ID are also displayed for the listed SICON.PLUGs in the app.
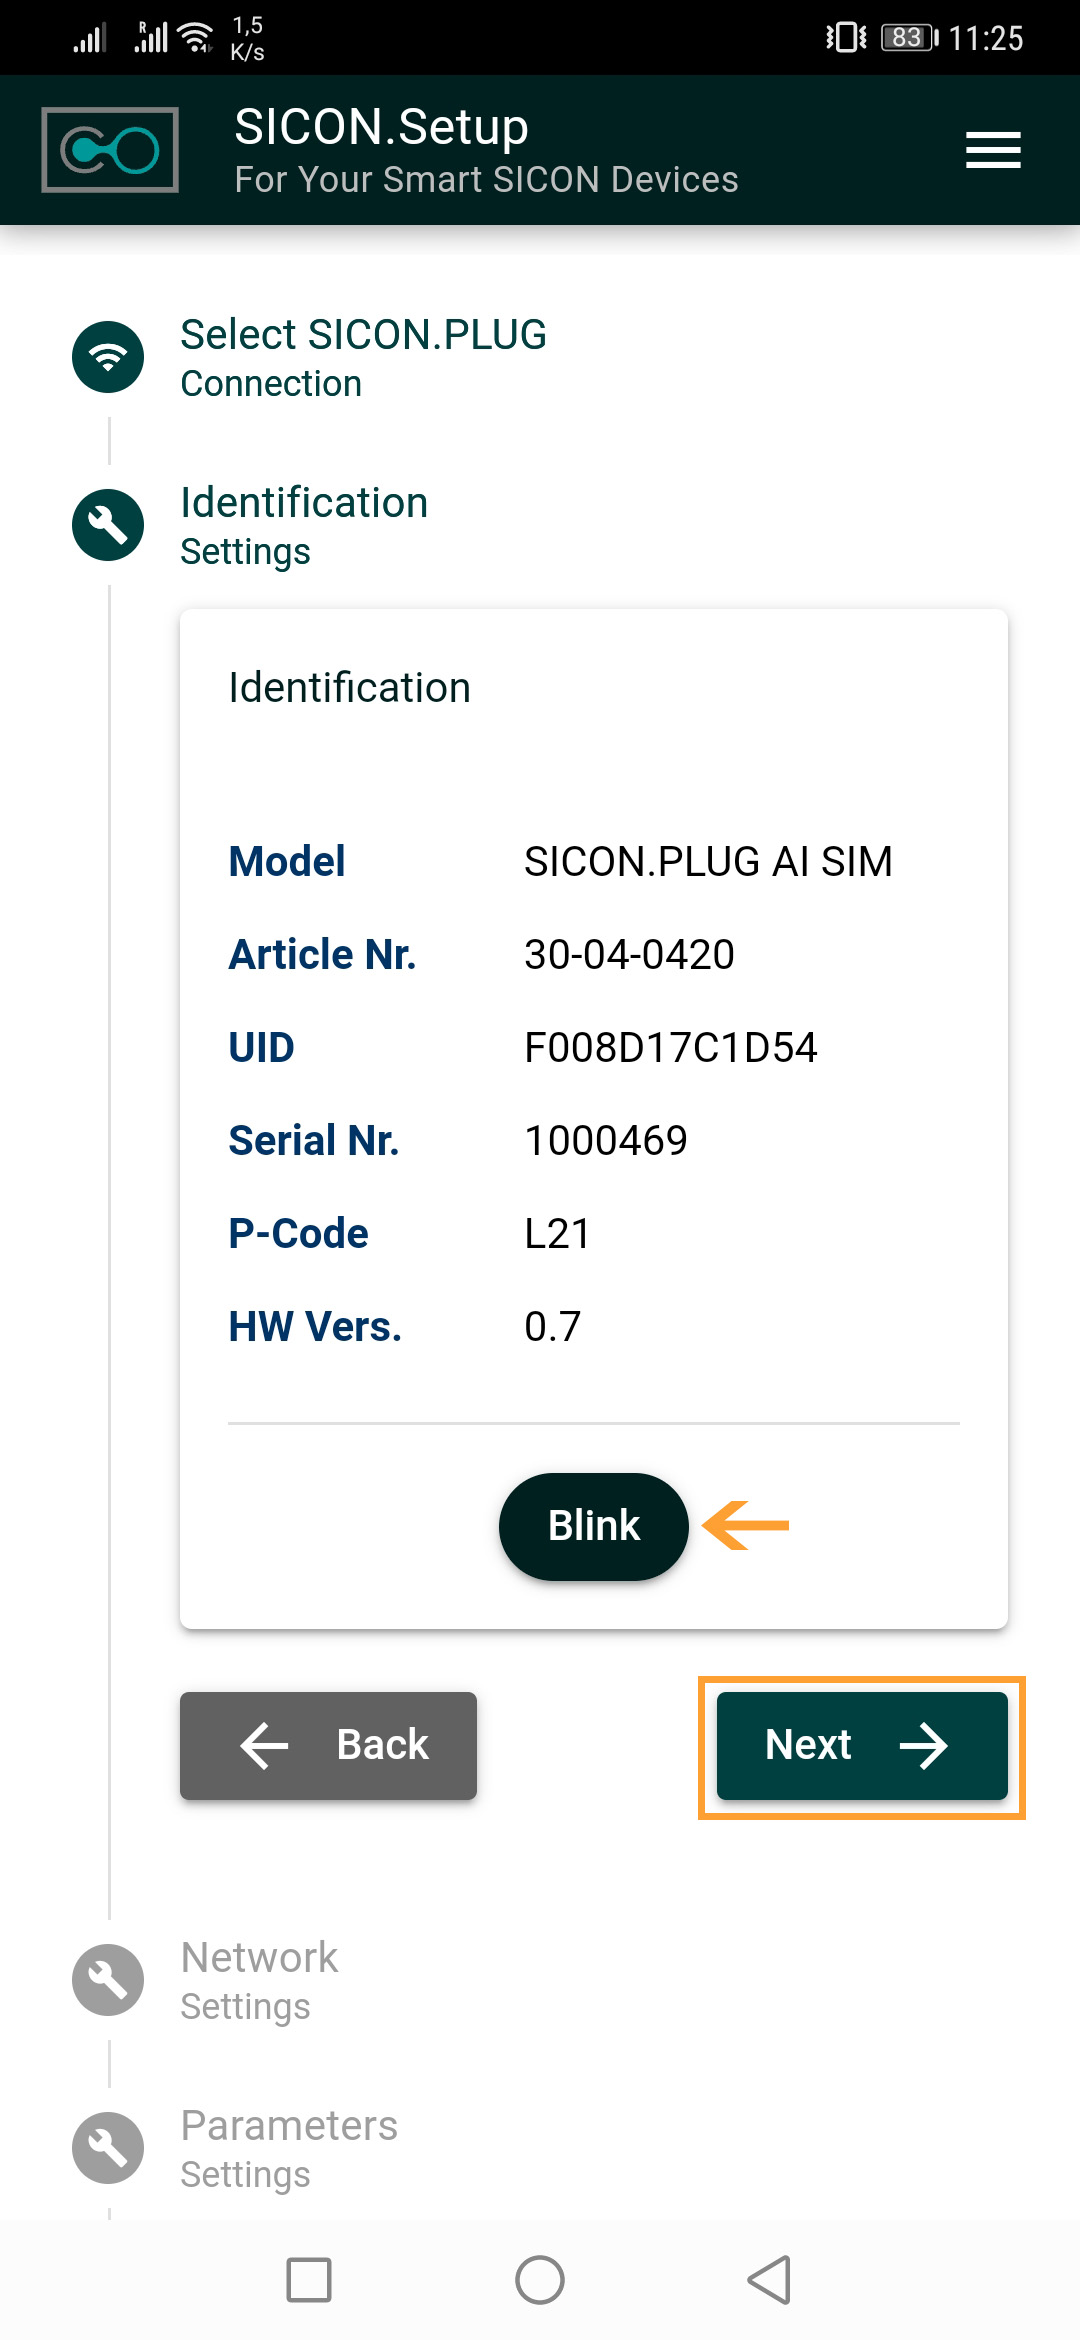
8. You can use the BLINK BUTTON to make sure once again that you have selected the correct SICON.PLUG. By pressing this button, all LEDs of the selected device light up white and clearly identify it. If you agree with your selection, you can jump to the next configuration step by pressing NEXT .
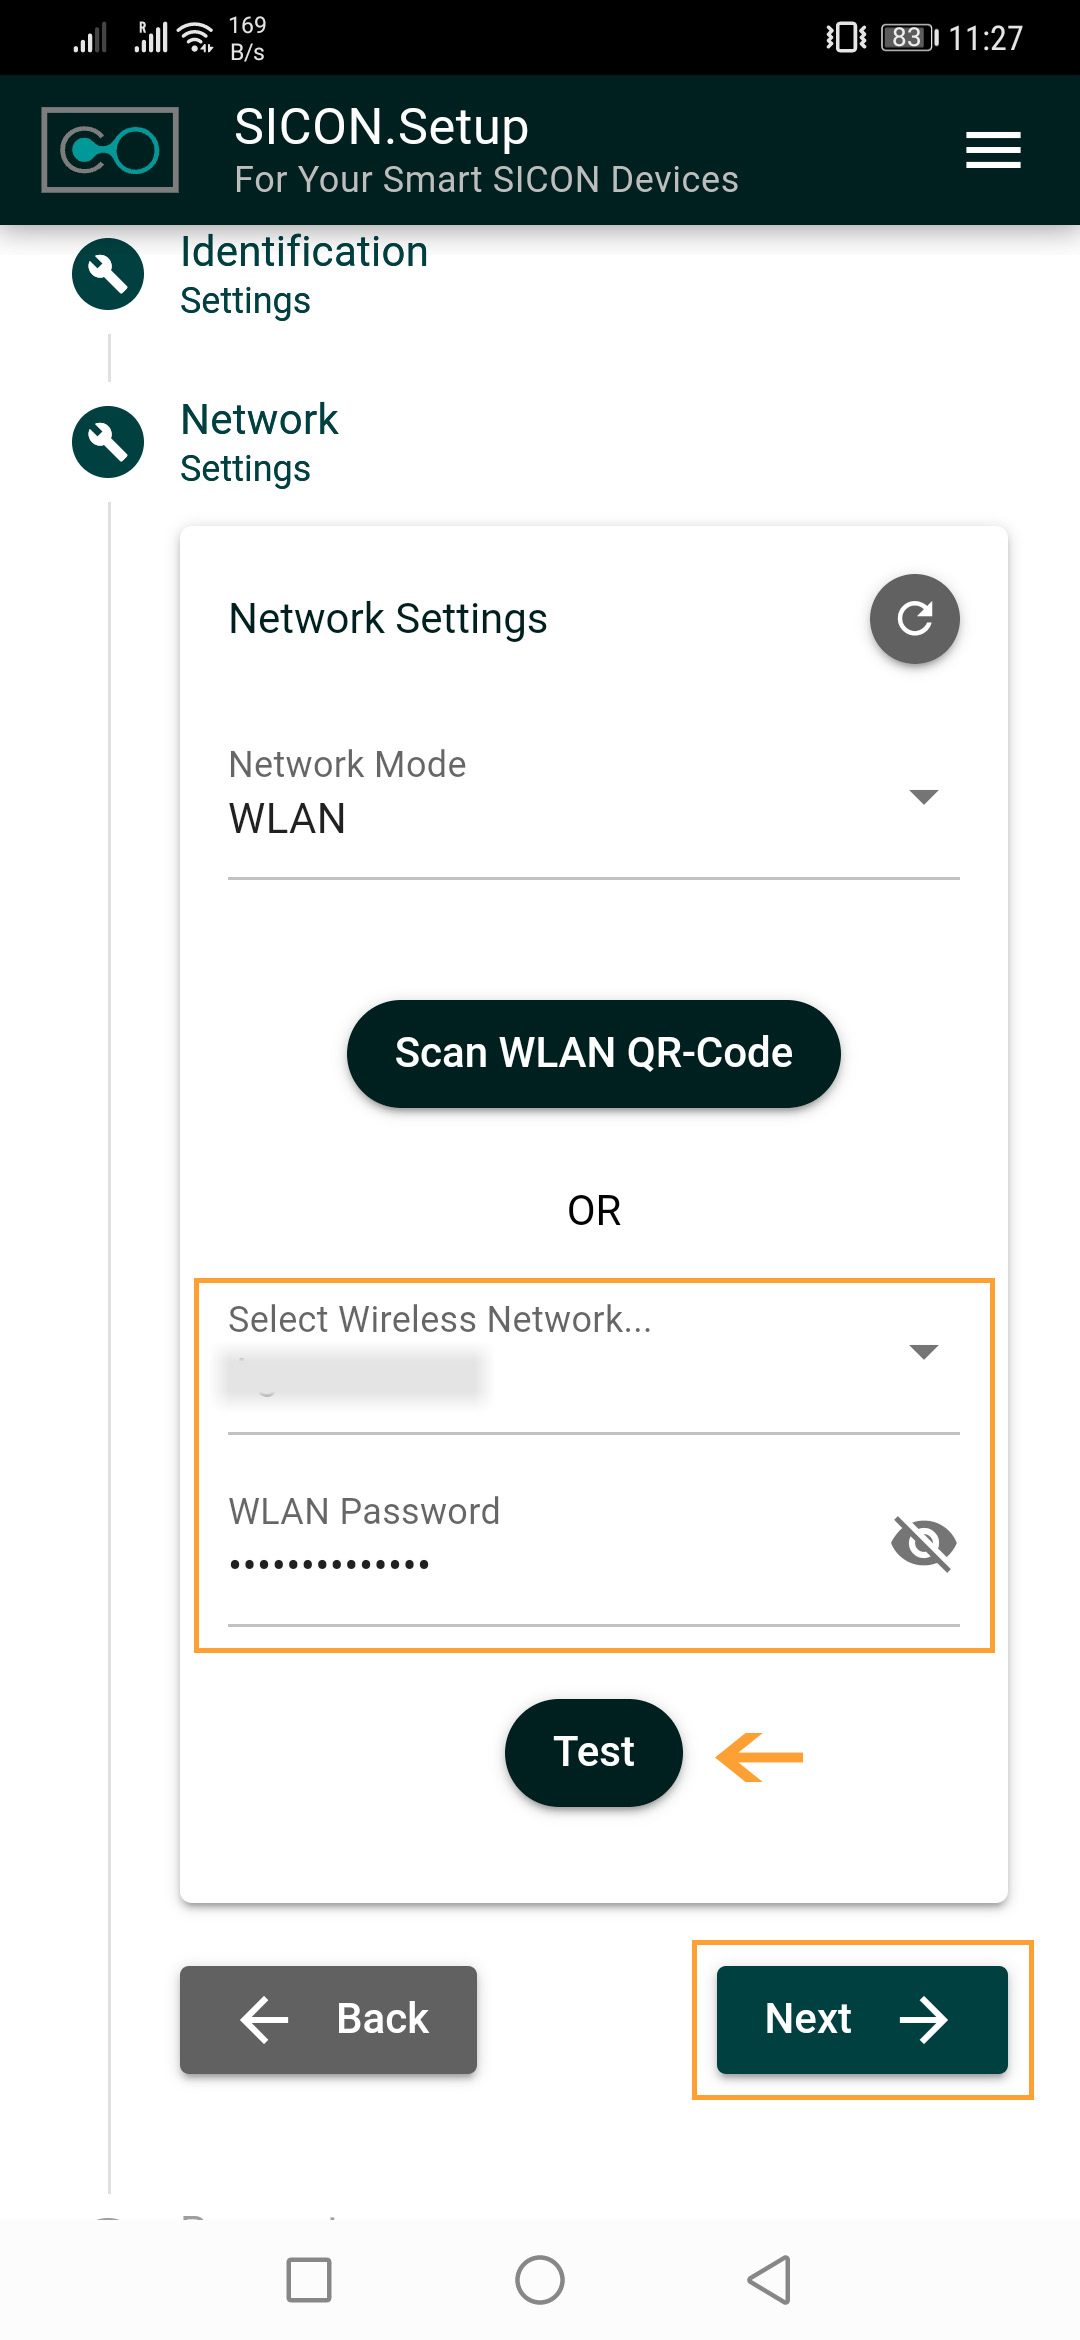
9. Now select whether you want to connect the device wireless via WLAN or via Ethernet to the company network.
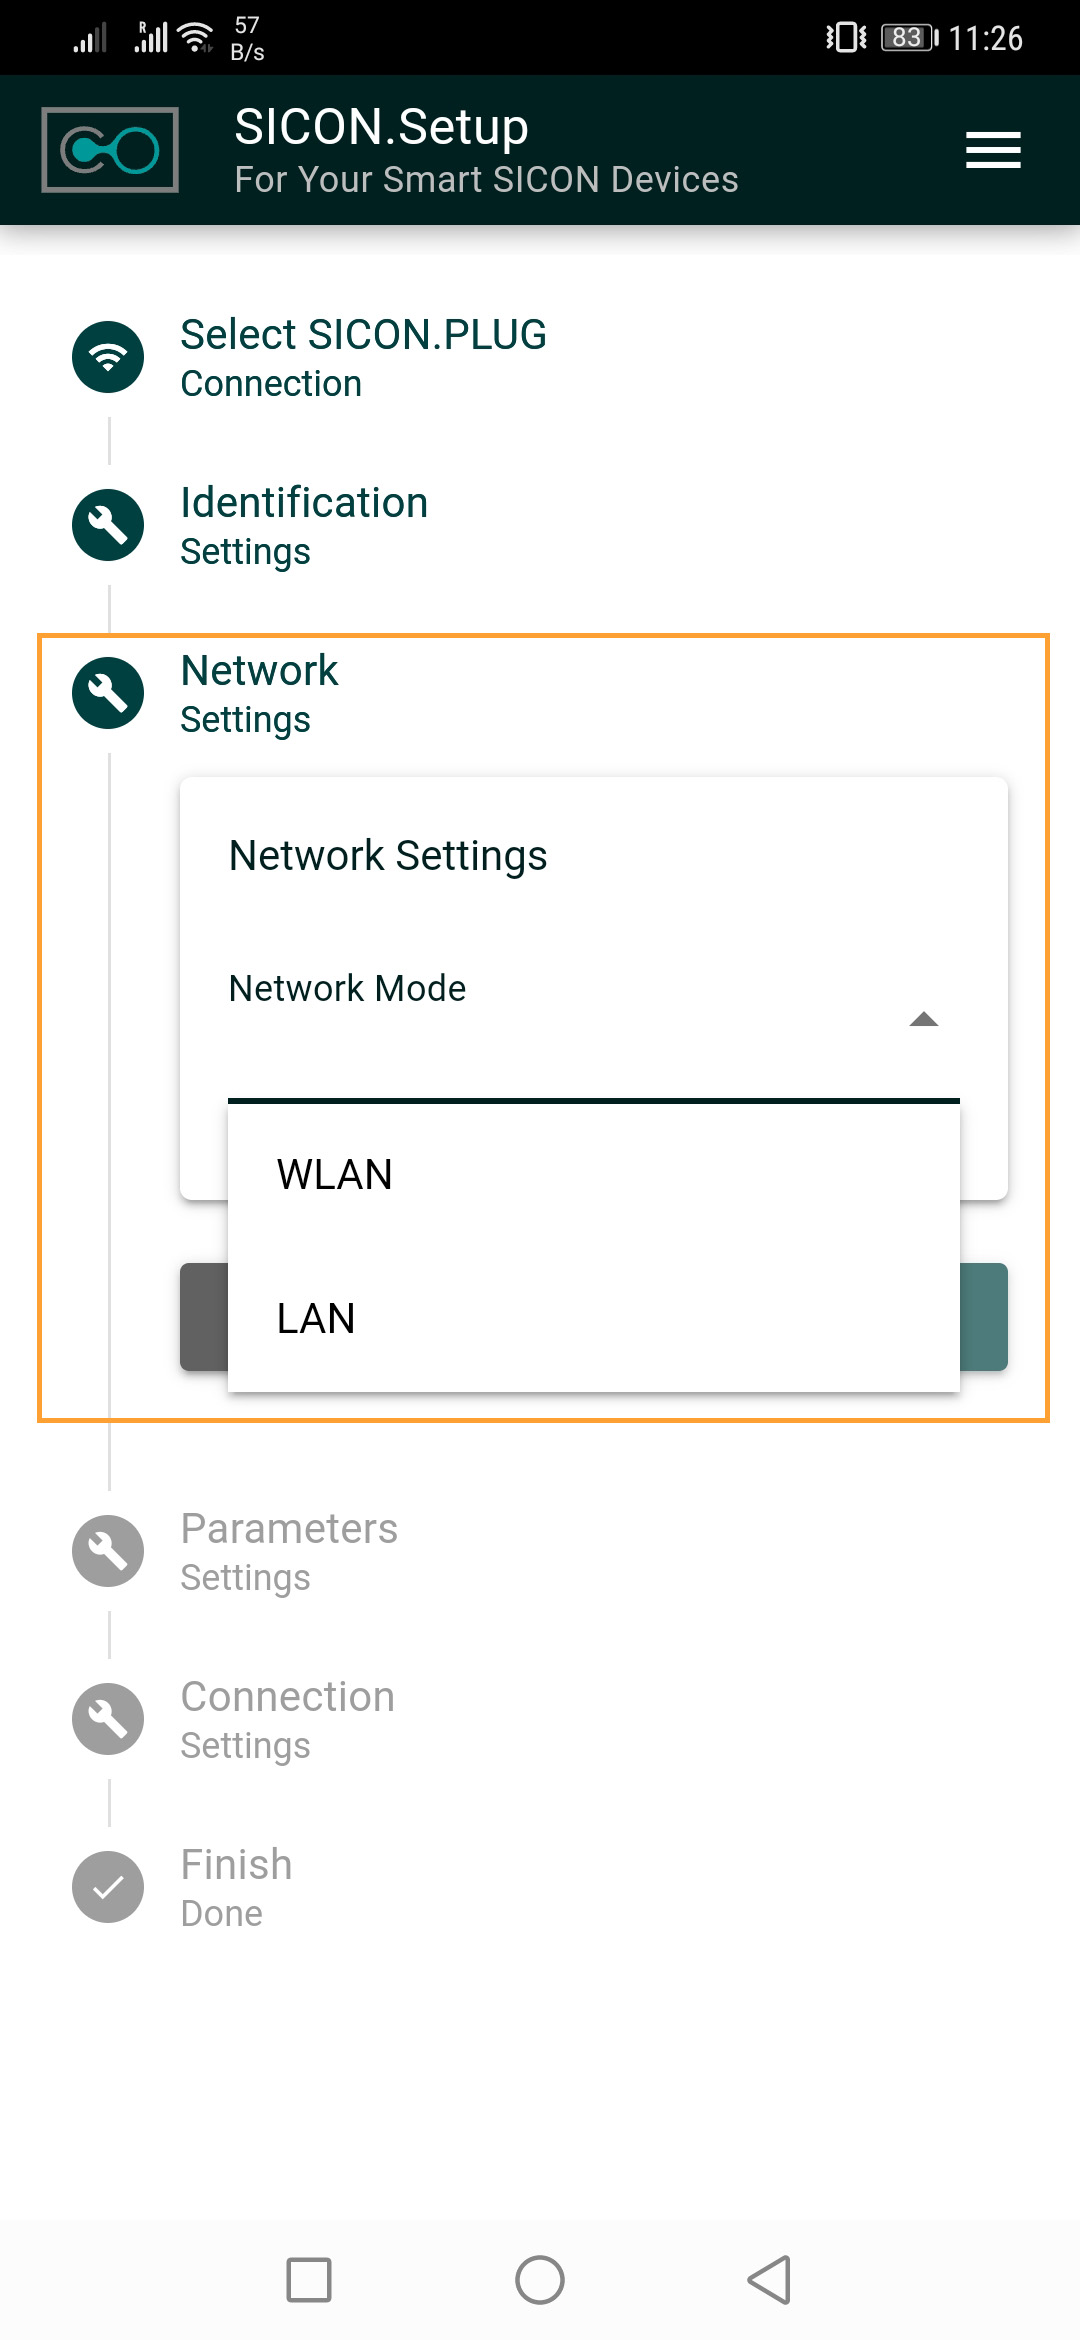
Network connection
WLAN connection
10. Select your preferred network from the drop-down menu.
If this cannot be found, you can scan your environment again with the REFRESH BUTTON .
11. Enter the WLAN Password belonging to the network. Use the TEST BUTTON to check whether the password entered is correct and whether the SICON.PLUG can establish a connection to the network. Finally, click on NEXT
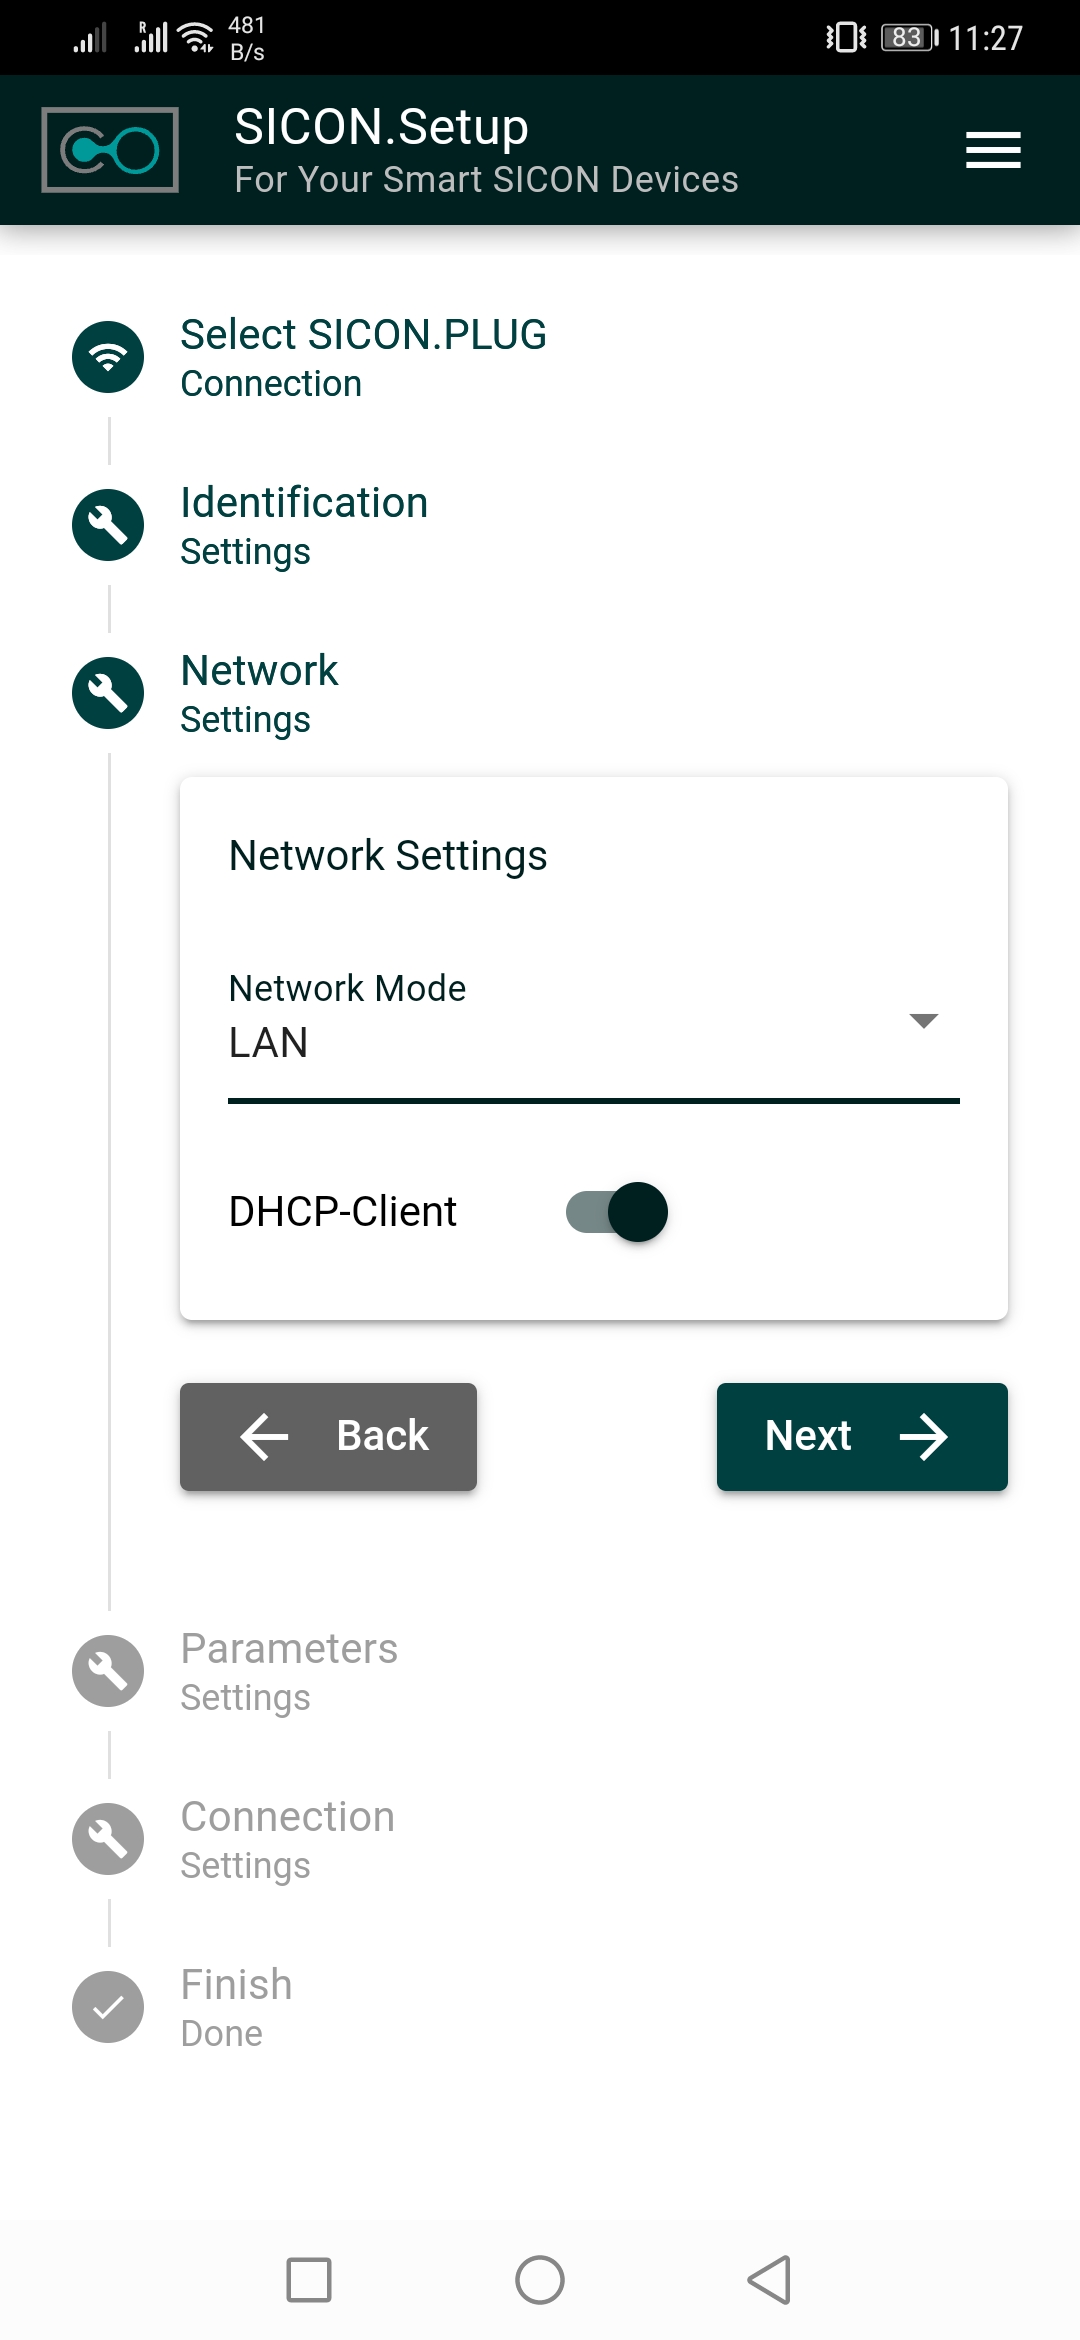
Ethernet connection
For this type of connection, it is necessary to connect your SICON.PLUG to your network using a patch cable.
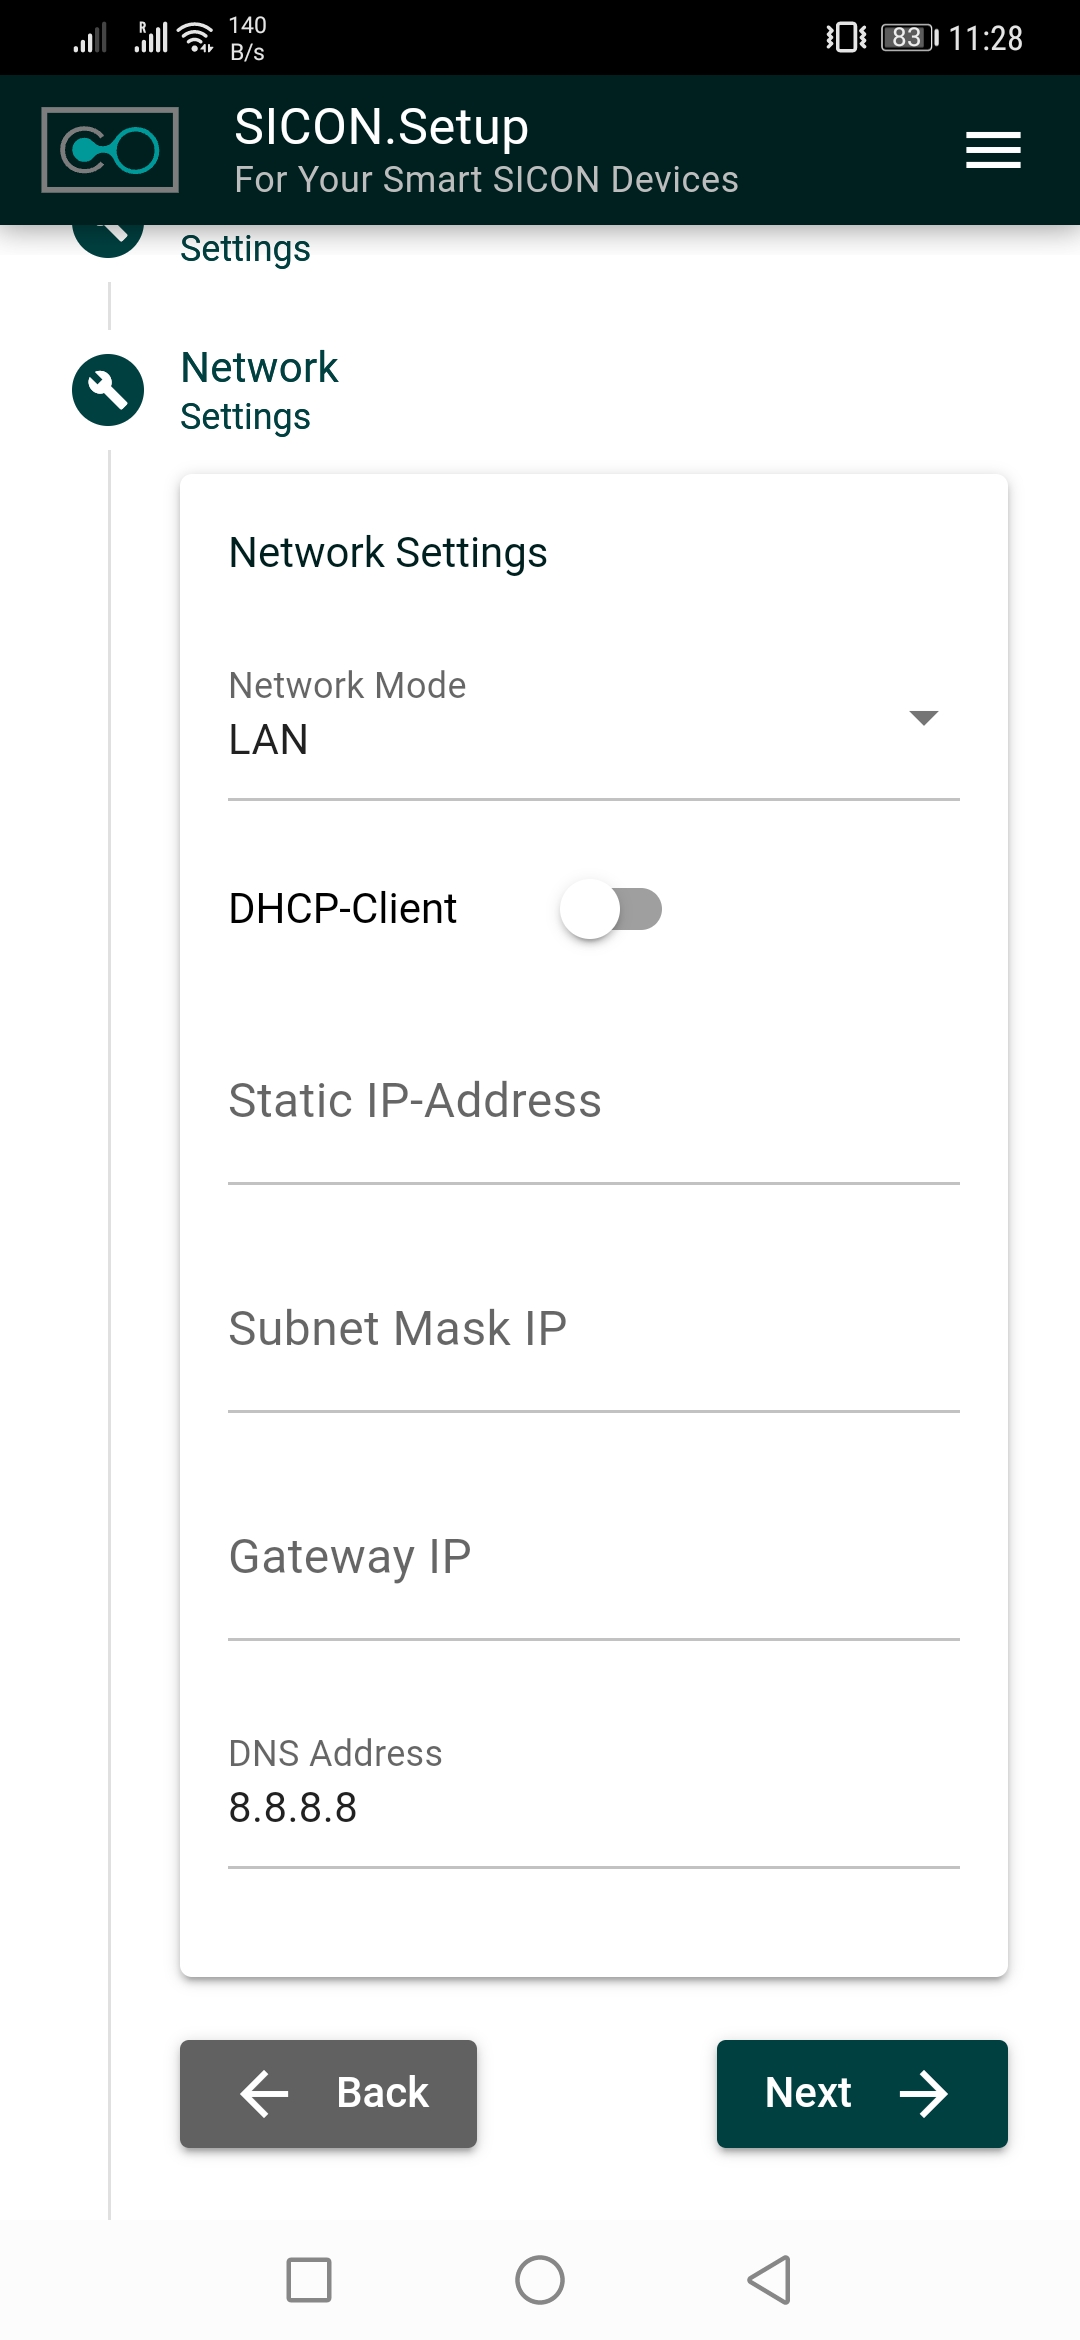
12. Under Network mode, select Ethernet. Now you can choose whether you want to integrate your SICON.PLUG into your network as a DHCP client or configure the network settings manually.
If you keep the setting DHCP client, the device receives all required settings via the network.
Please note that the IP address is assigned dynamically, i.e. the IP address may have changed after each restart of the device. You do not need to make any further settings here and can skip step 12 & 13.
If you do not want to do this, please make the settings manually and assign a static IP address to the SICON.PLUG.
13. If you have decided to set the network parameters manually, you can now enter the settings in the corresponding fields. You should ask your network administrator for these settings beforehand.
If you want a local installation, please make sure that the SICON.PLUG and the OT side of your edge computer, e.g. SICON.OS, is located in the same network.
Input of the device parameters (digital Twin)
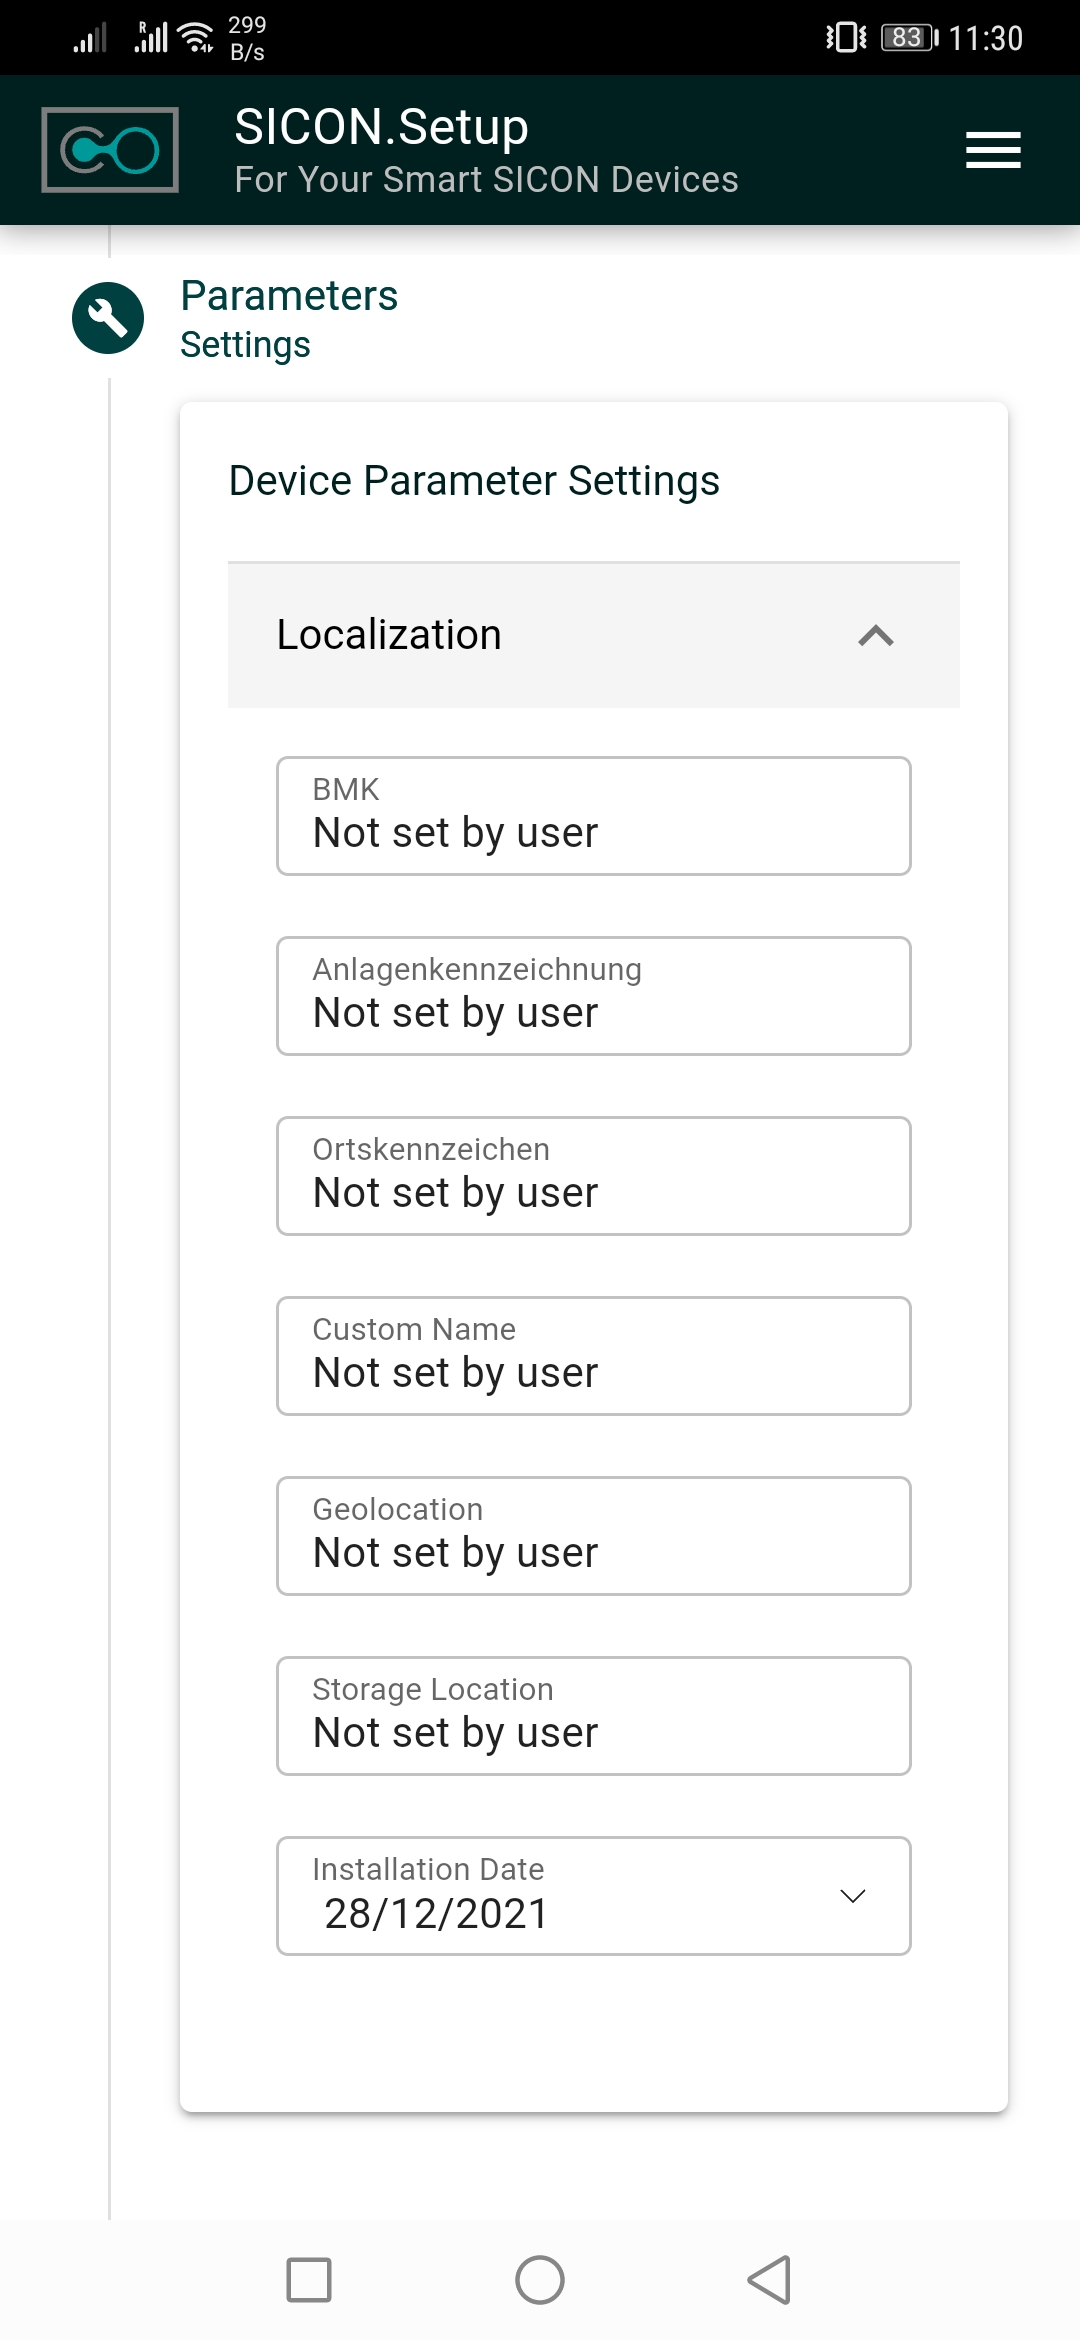
14. Please select the Device parameter settings e.g. Localization and click on Next.
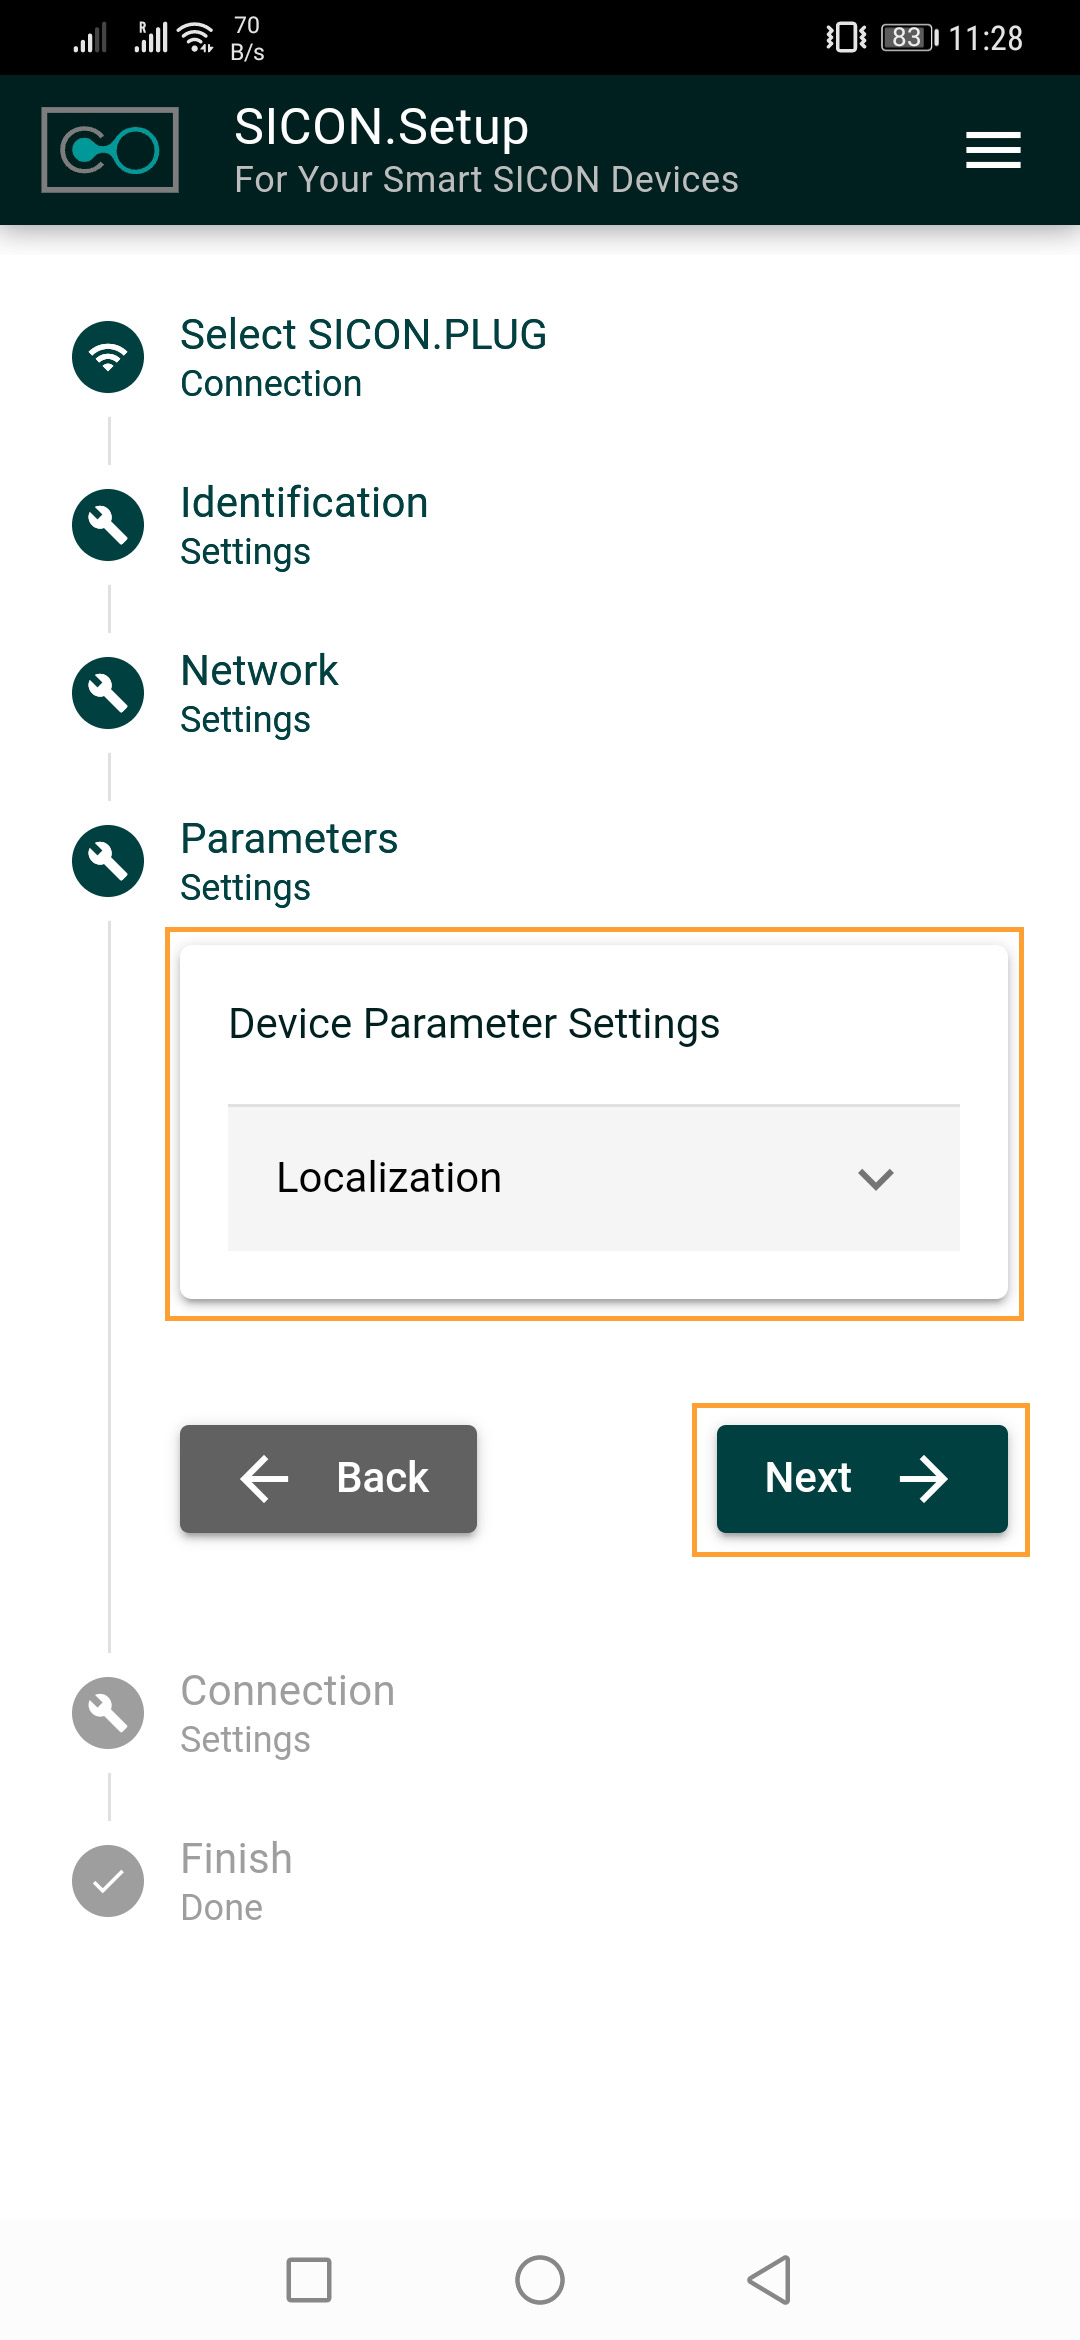
15. Please fill in the following fields given in Device parameters settings under Localization.
BMK (Equipment marking) → Individual label that clearly identifies your Plug.
Plant identification→ individual label that clearly identifies the plant in which your Plug is installed.
Location label → Location where the Plug is installed.
Custom Name → Internal name of the Plug.
Geolocation → Place/city where the jumbo is located.
Storage Location → This is the location where the spare parts of the Plug are located.
Installation Date → Date when the Plug was put into operation.
Connection to the IOT platform
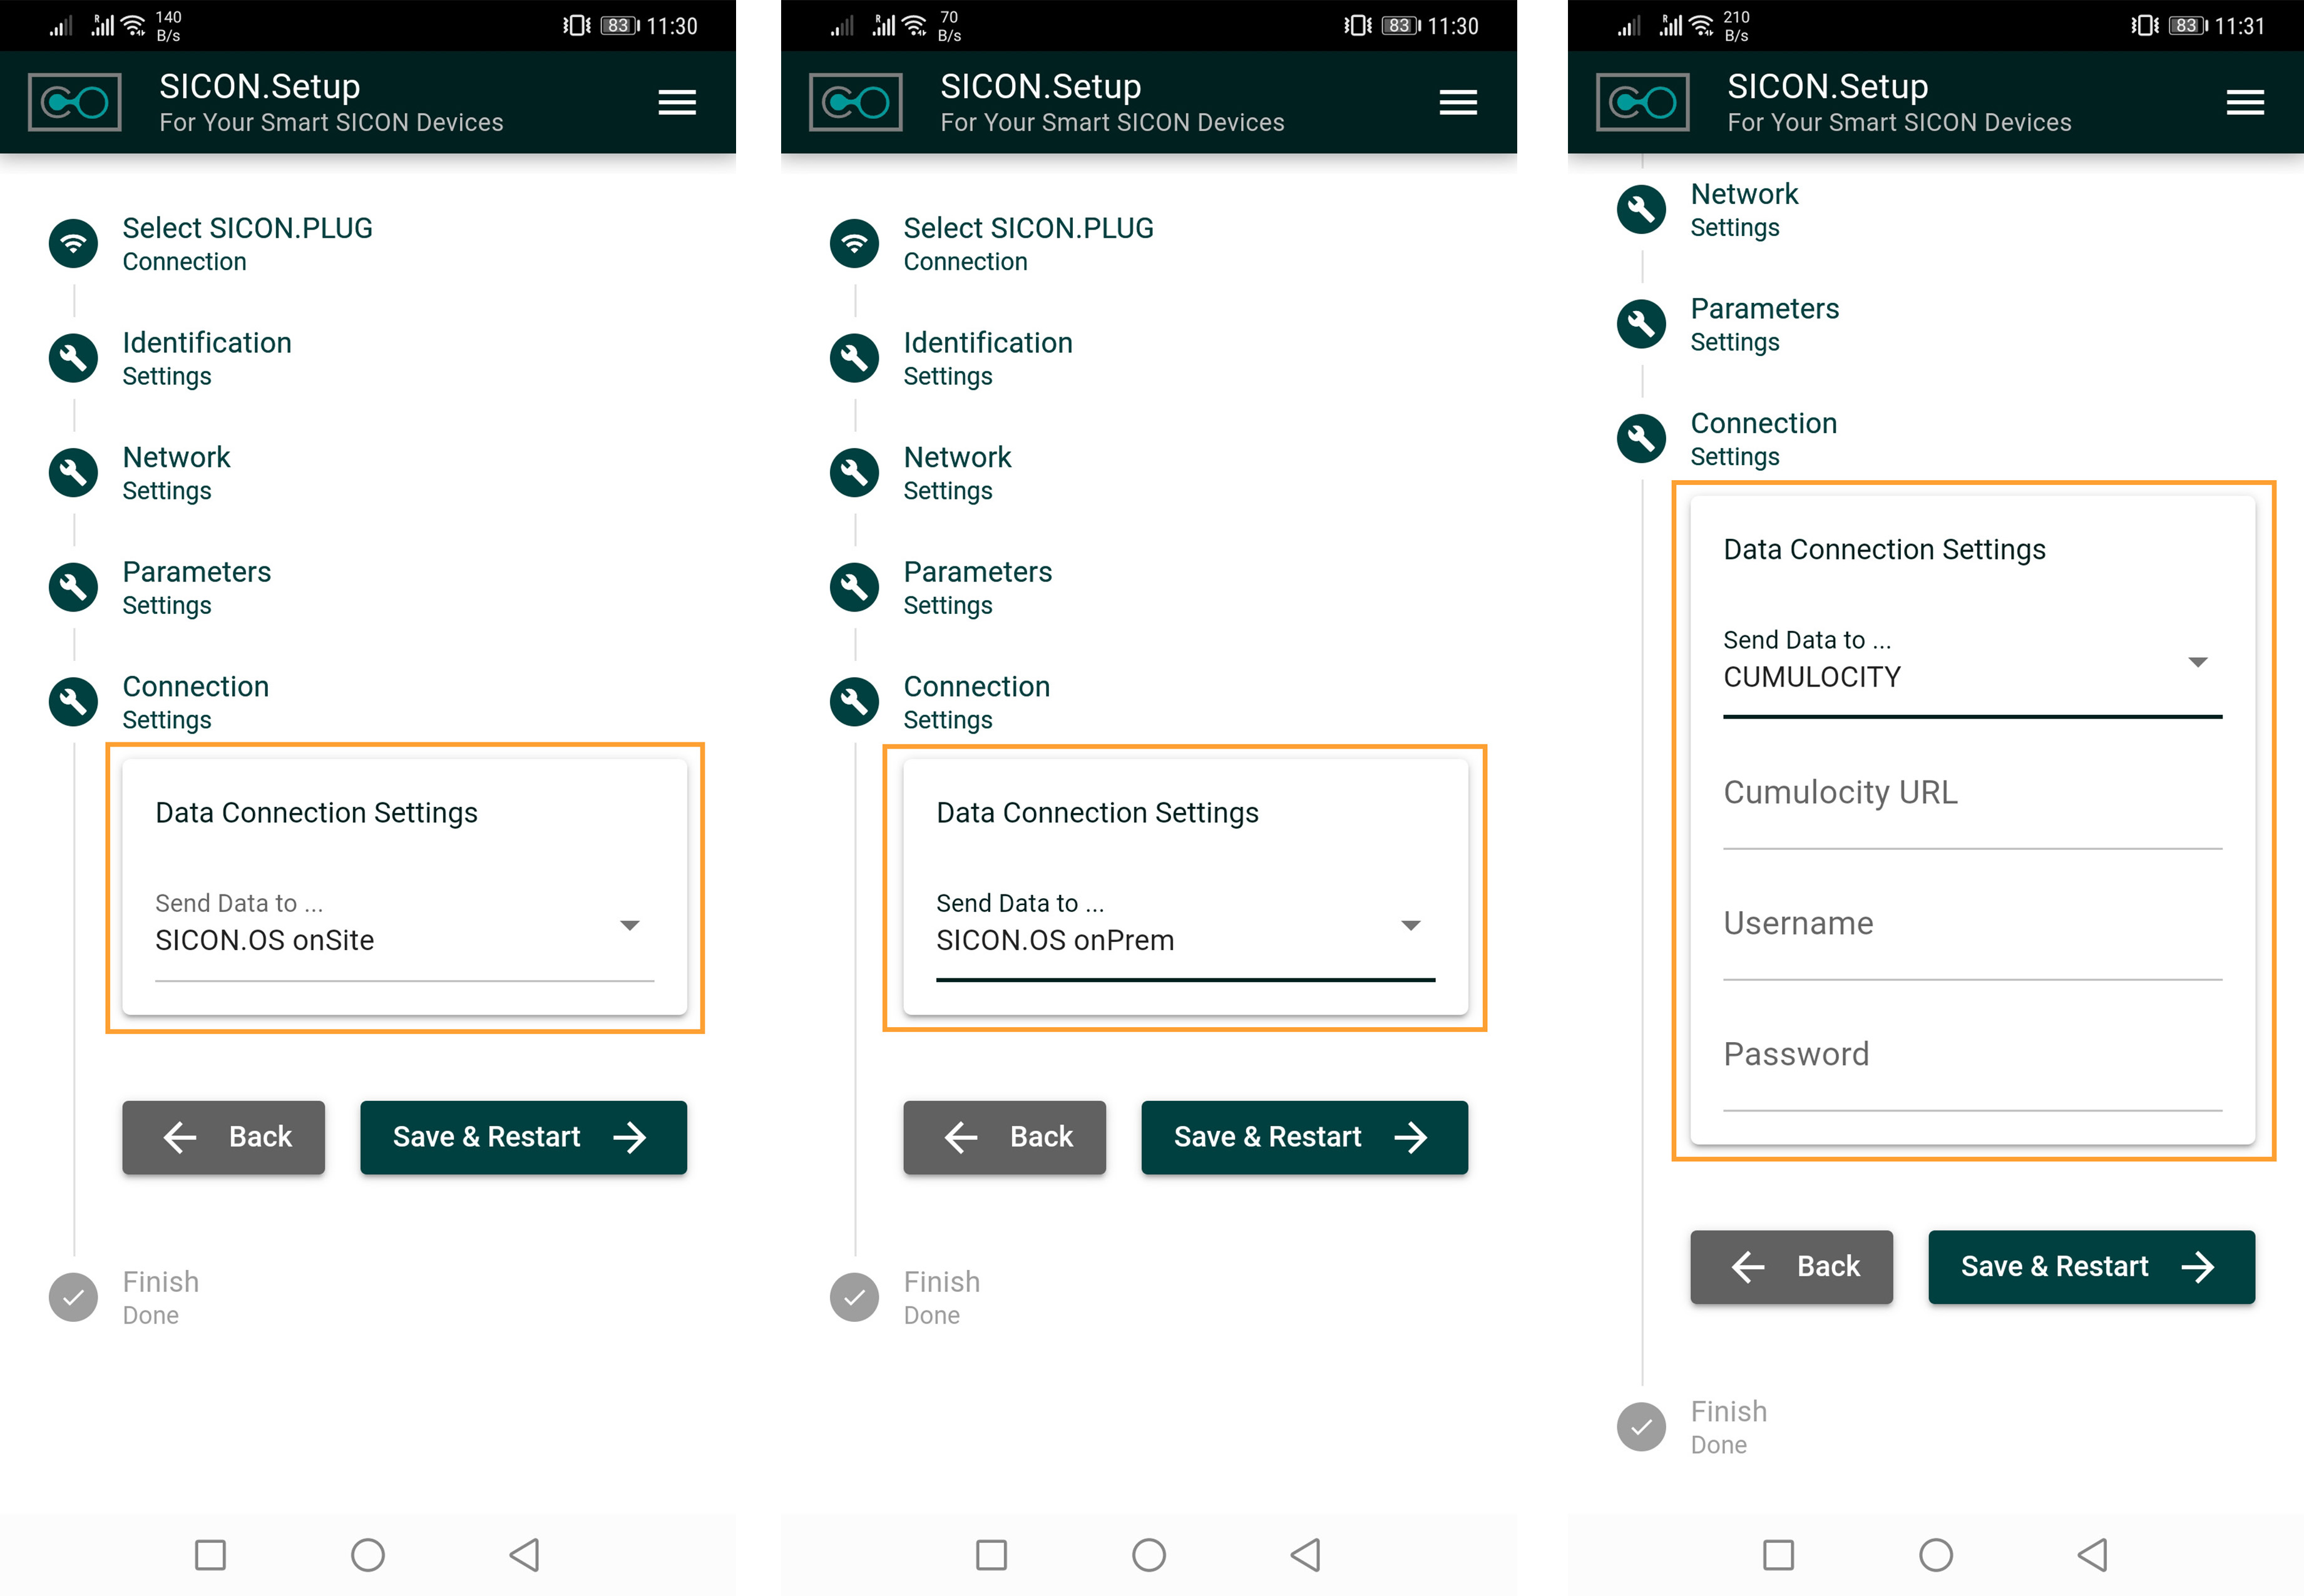
16. In the last configuration step you have to define to which IOT platform your SICON.PLUG should connect.
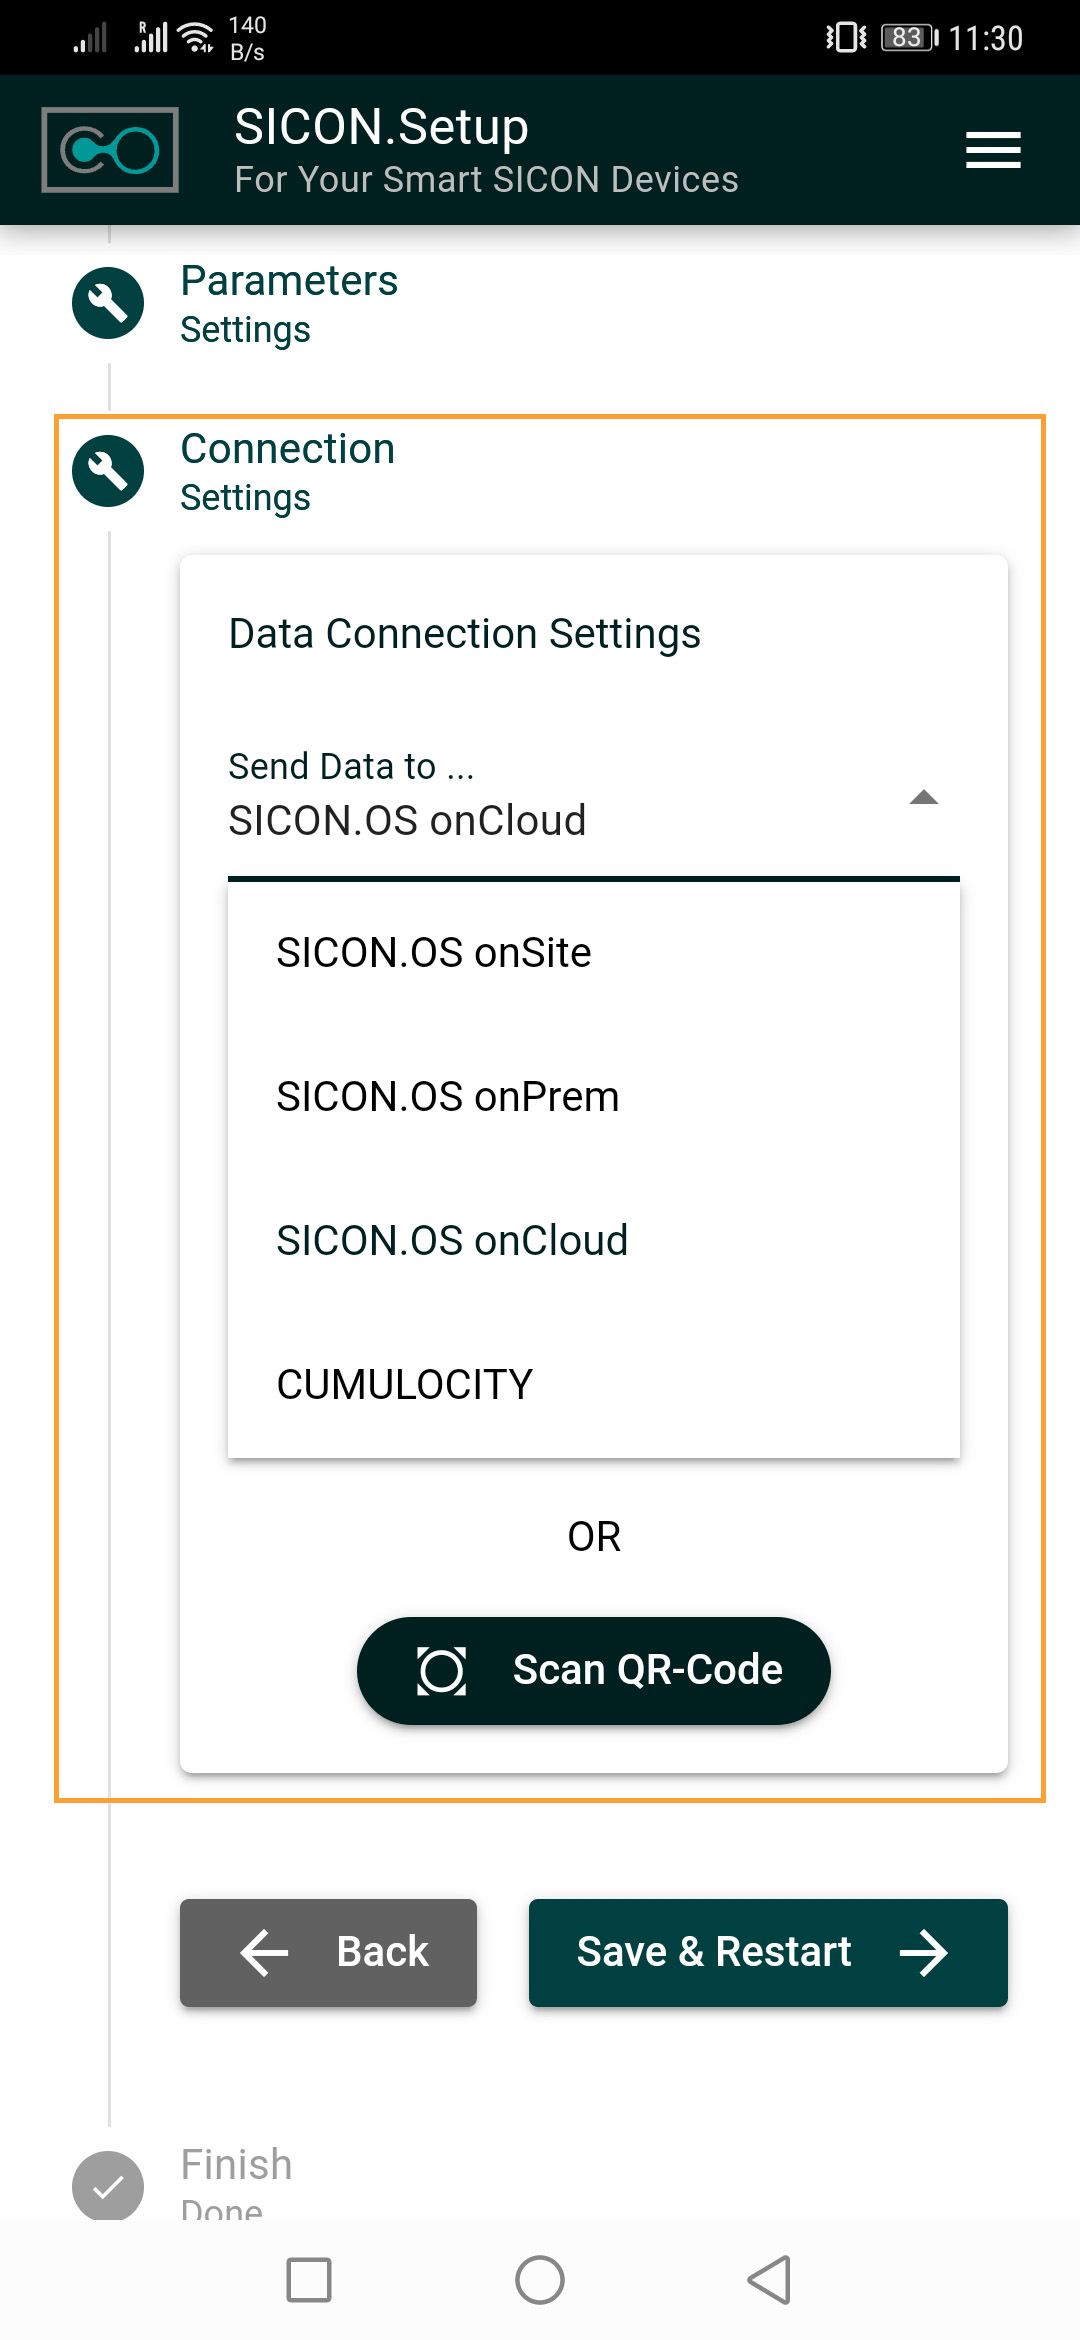
You can connect your SICON.PLUG to following IOT platform:
SICON.OS onSite
SICON.OS onPrem
CUMULOCITY
SICON.OS onCloud
Connection to a Cloud
17. If you have chosen a cloud solution, please select the OnCloud setting in the drop-down menu and fill in the following fields:
Enter the address where your cloud can be found in the URL field.
Enter your access data for your cloud under Username and Password.
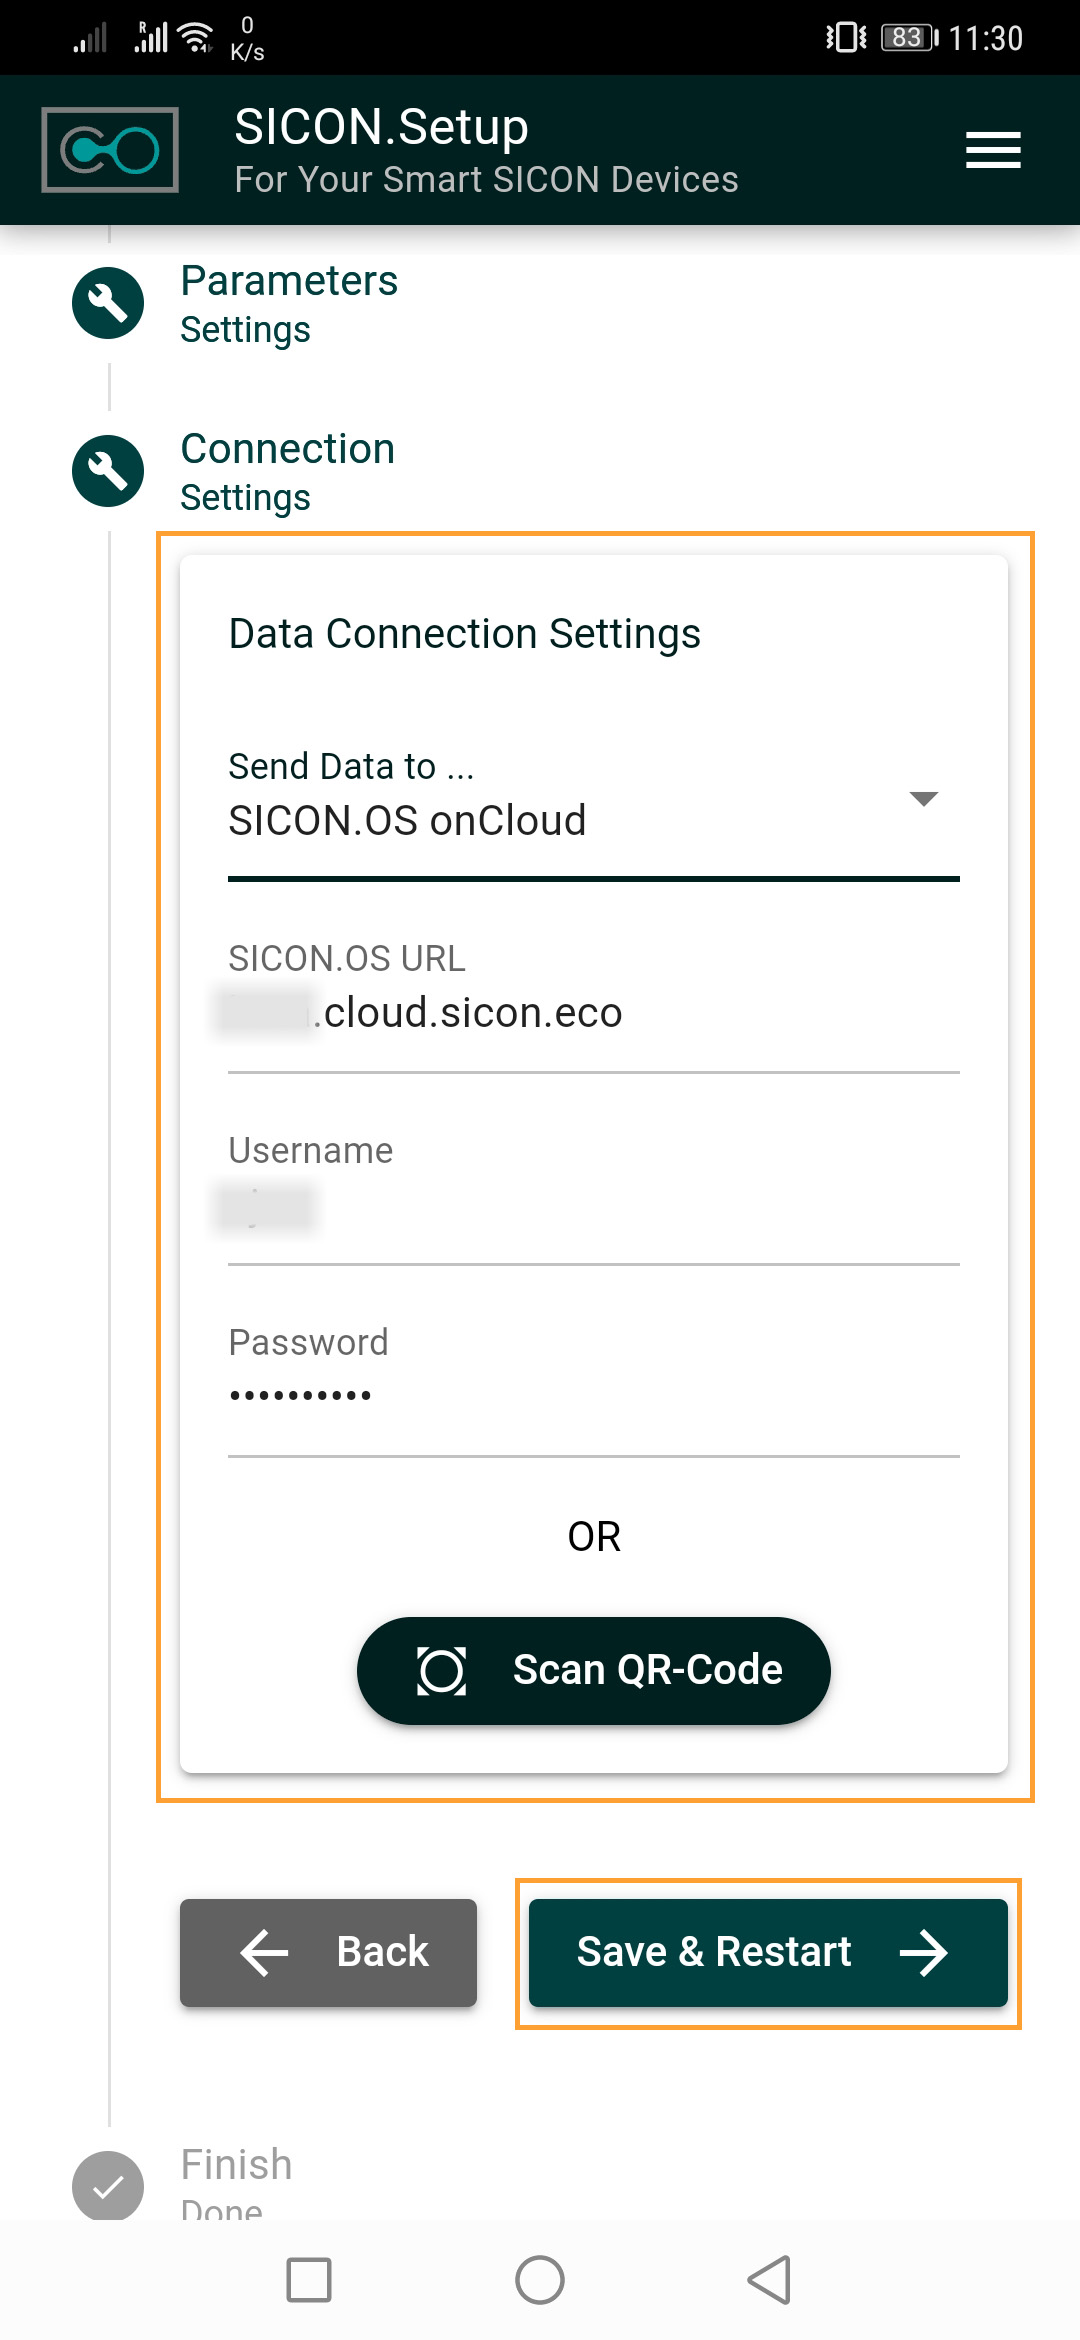
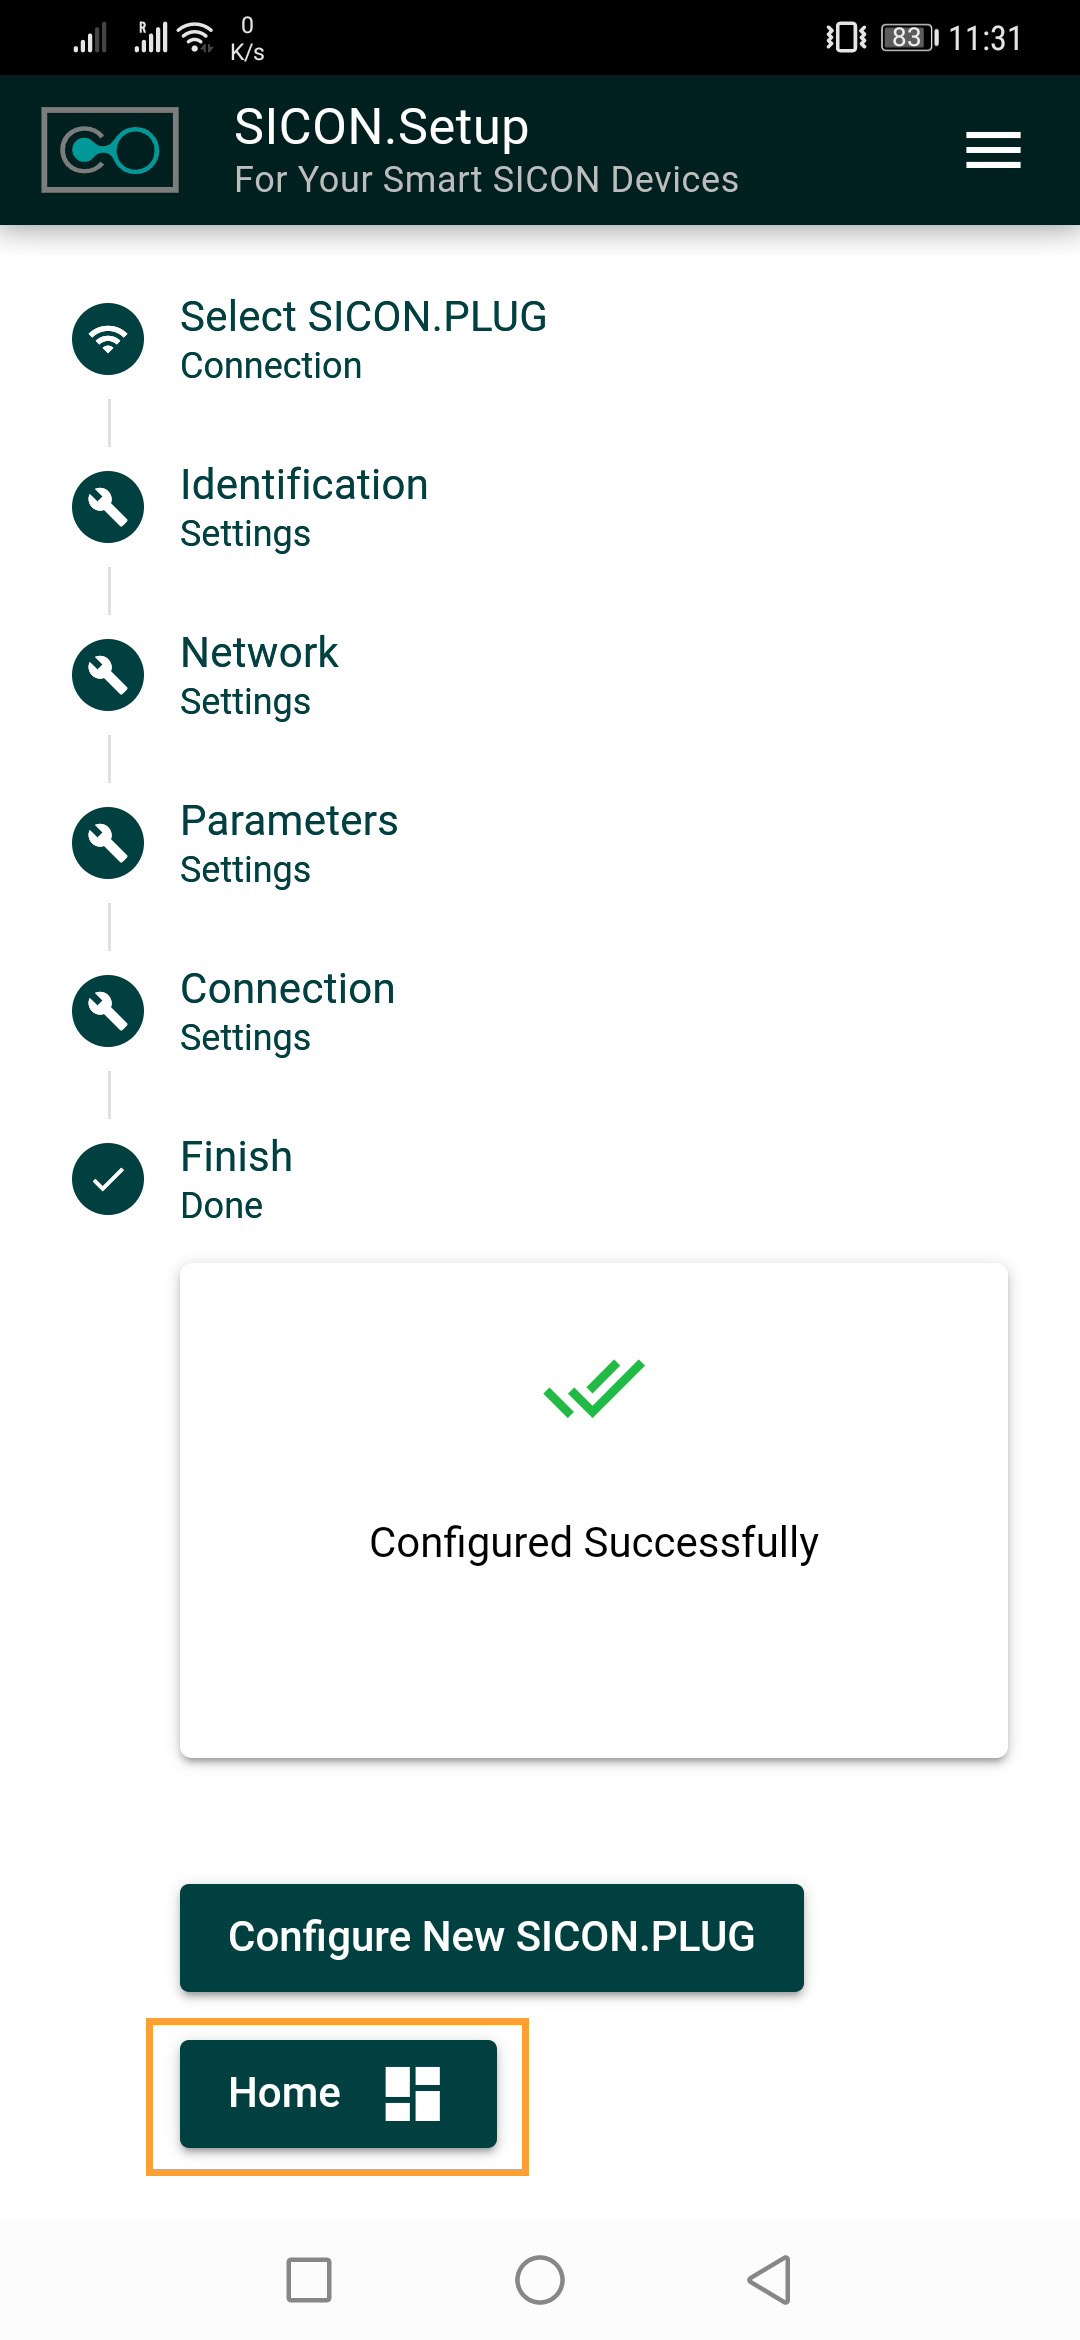
18. Click on SAVE & RESTART Button to complete the registration. The device restarts and adopts the settings.
If you have entered everything correctly, the plug connects to the desired cloud after clicking on Save & Restart.
To go back to Homepage, click on HOME Button.
SICON.OS Cloud
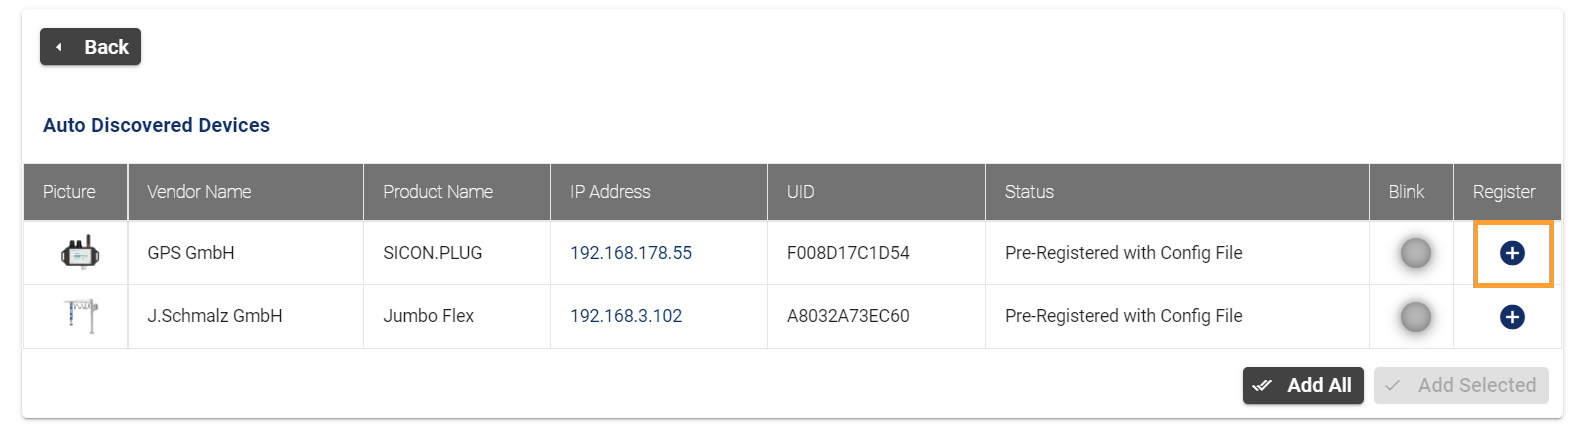
The device is now set up via the app and is connected to the SICON.OS onCloud.
Open the browser on your PC or tablet, type the SICON.OS onCloud URL and log in with your user name
and password.The SICON.PLUG is now visible to the SICON.OS and can be registered with it.
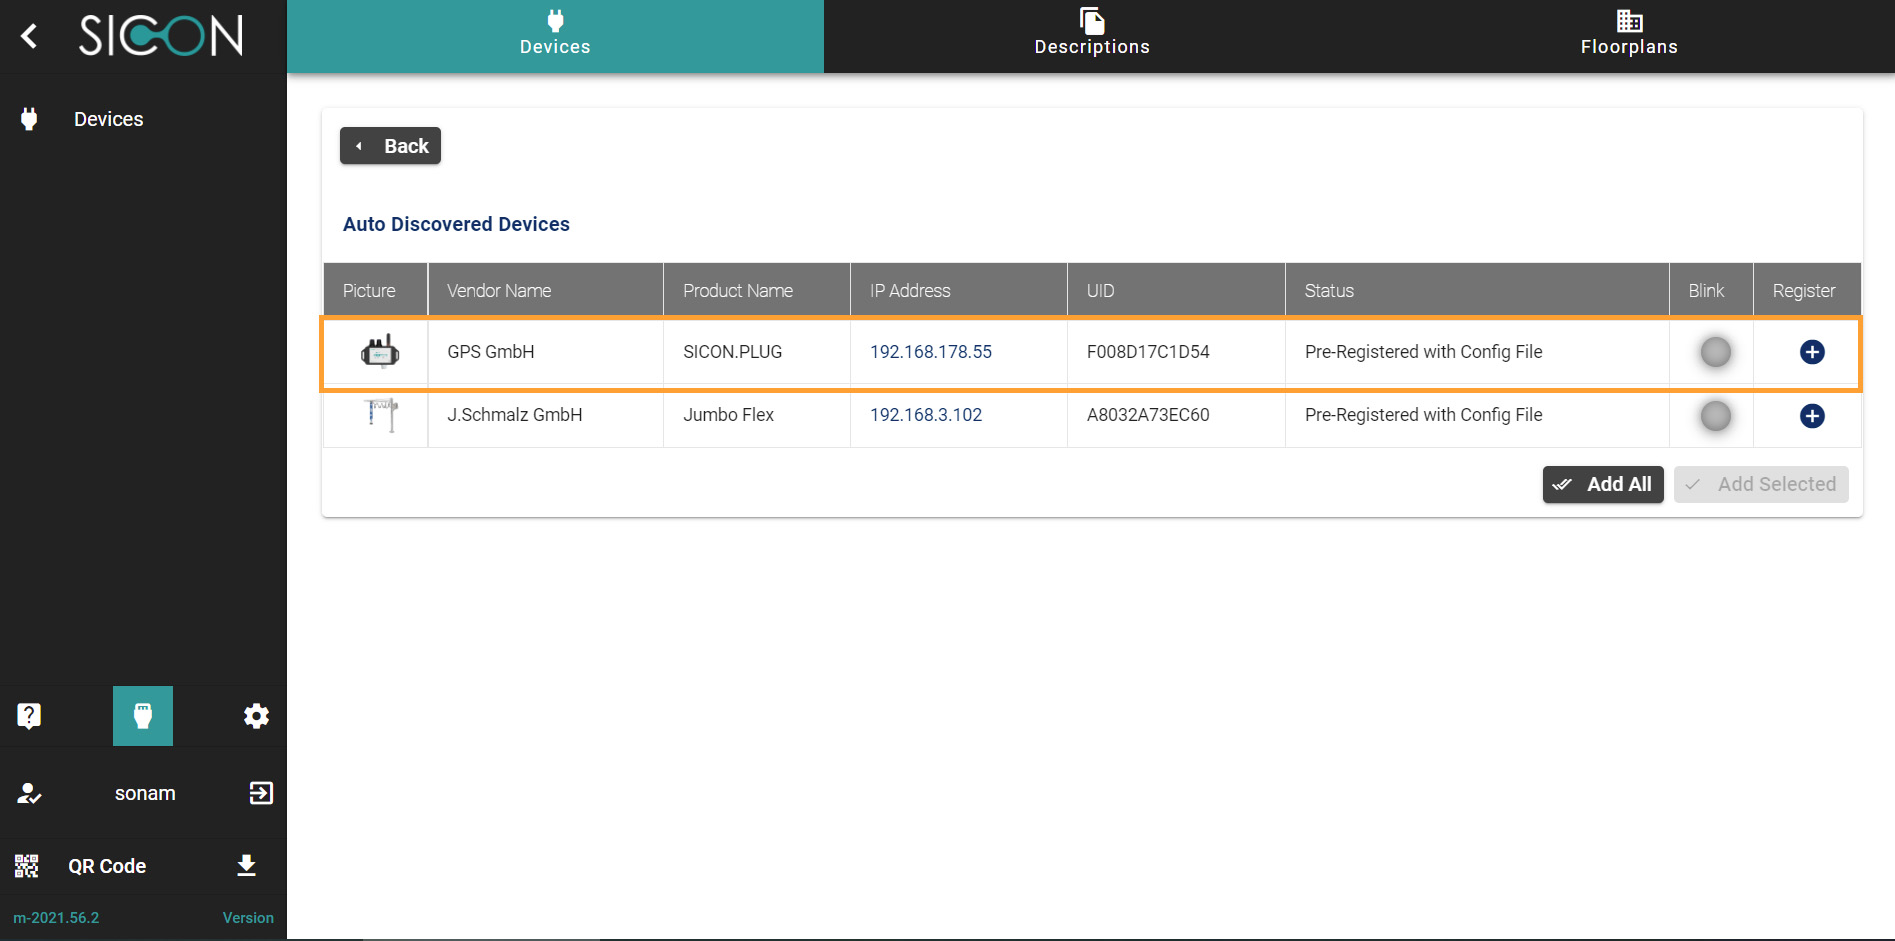
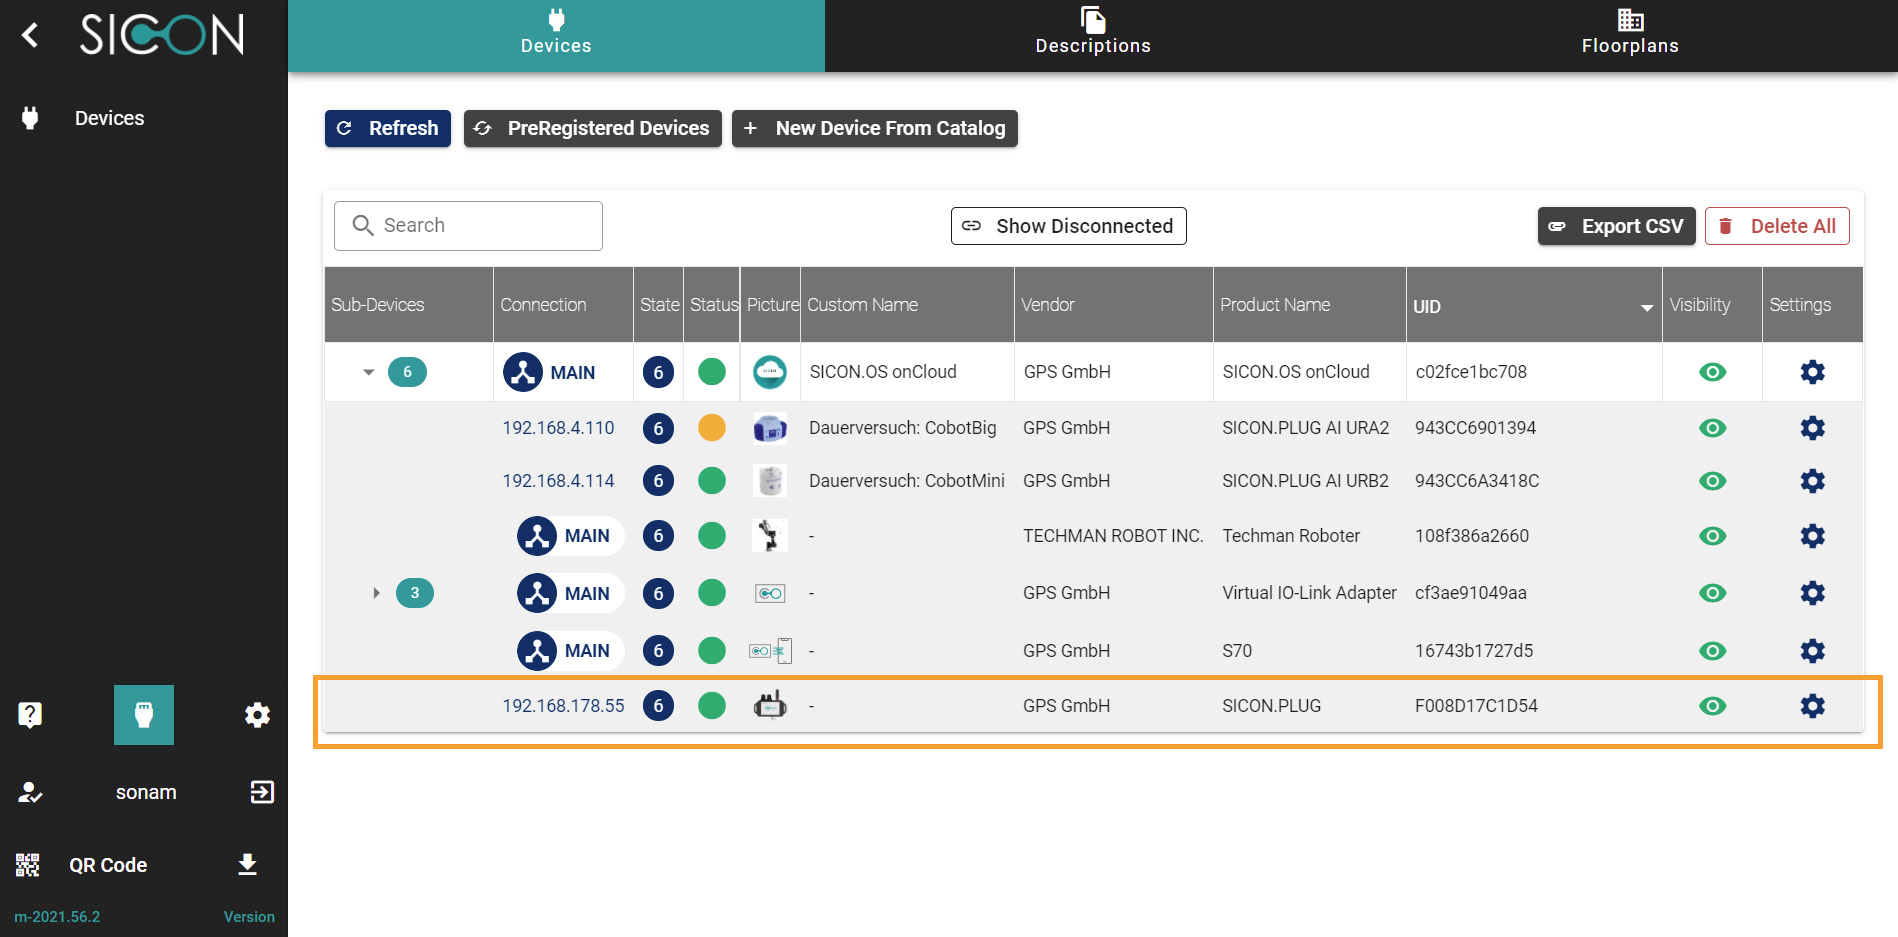
Click on REGISTER Button to see whether the Plug is registered or not.