Quick installation guide for SICON.OS P10
Connect SICON to the network
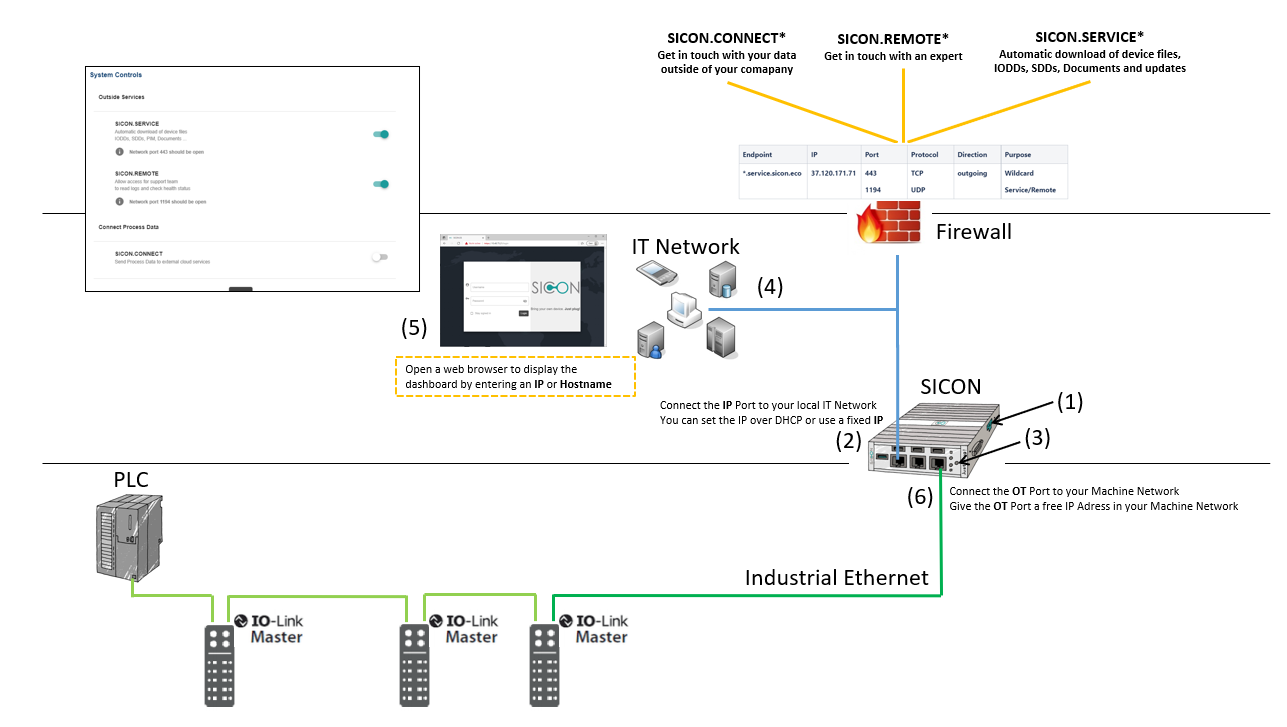
Steps to Connect SICON to the network (please see picture above)
Connect your SICON to the power supply (1)
Connect IT port to the IT network (2)
Please pay attention to the required IT network settings. Please refer to IT network settings
Switch on the SICON via the on/off button (3)
Make sure that your end device has been assigned an IP address by the DHCP server. This requires that you obtain your network configuration (4) automatically.
For details please check example.
Please be aware of the required IT network settings, check details
Connect to SICON by entering the host name or IP address in your web browser (5).
You will find the hostname printed on the label of your Hardware.
You can search for the SICON.OS in your Network manager. SICON.OS is a UPNP Device.
The IP address can be provided by your IT network administrator.
Press Button “Get Started” and follow the steps in the SICON User interface, for details please visit SICON.OS Online Documentation
Enter License key. To get the License key, please follow the instructions in the provided welcome document.
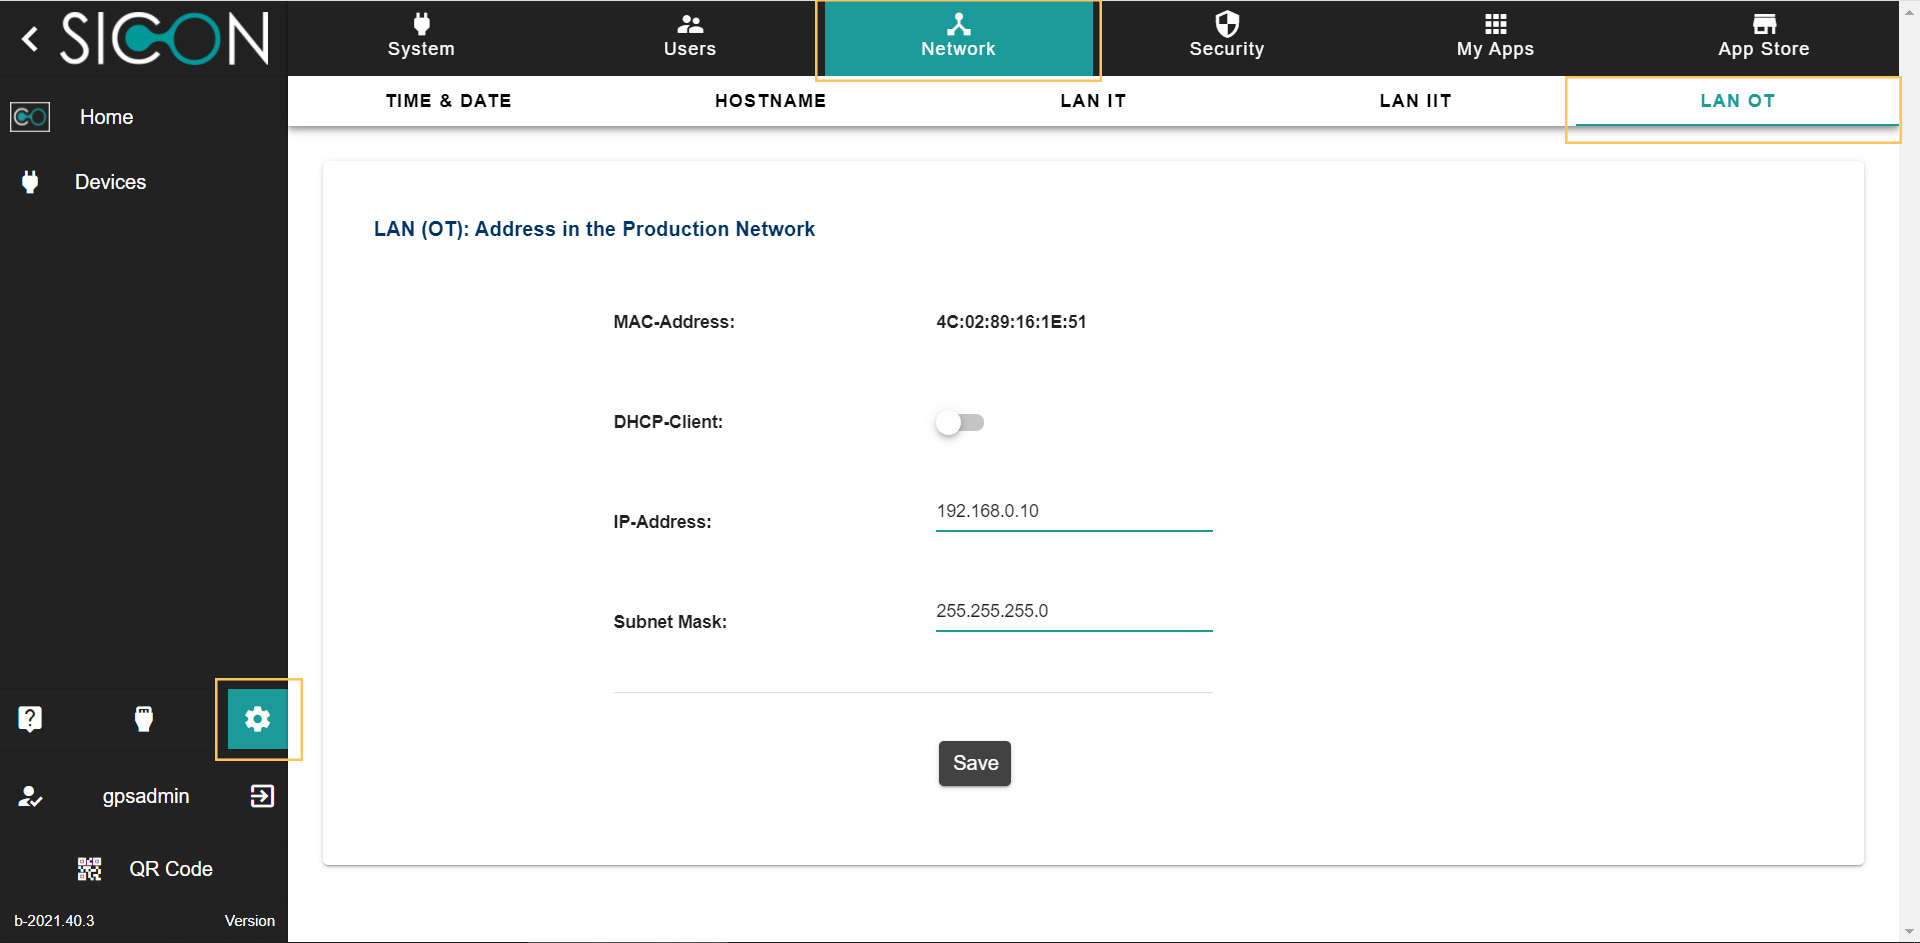
Integrate SICON in the Machine network by connecting the OT Port (6) to your Machine network. Open Network settings ➡ Settings ➡ Network ➡ LAN OT and give the OT Port a free IP Address in your Machine network
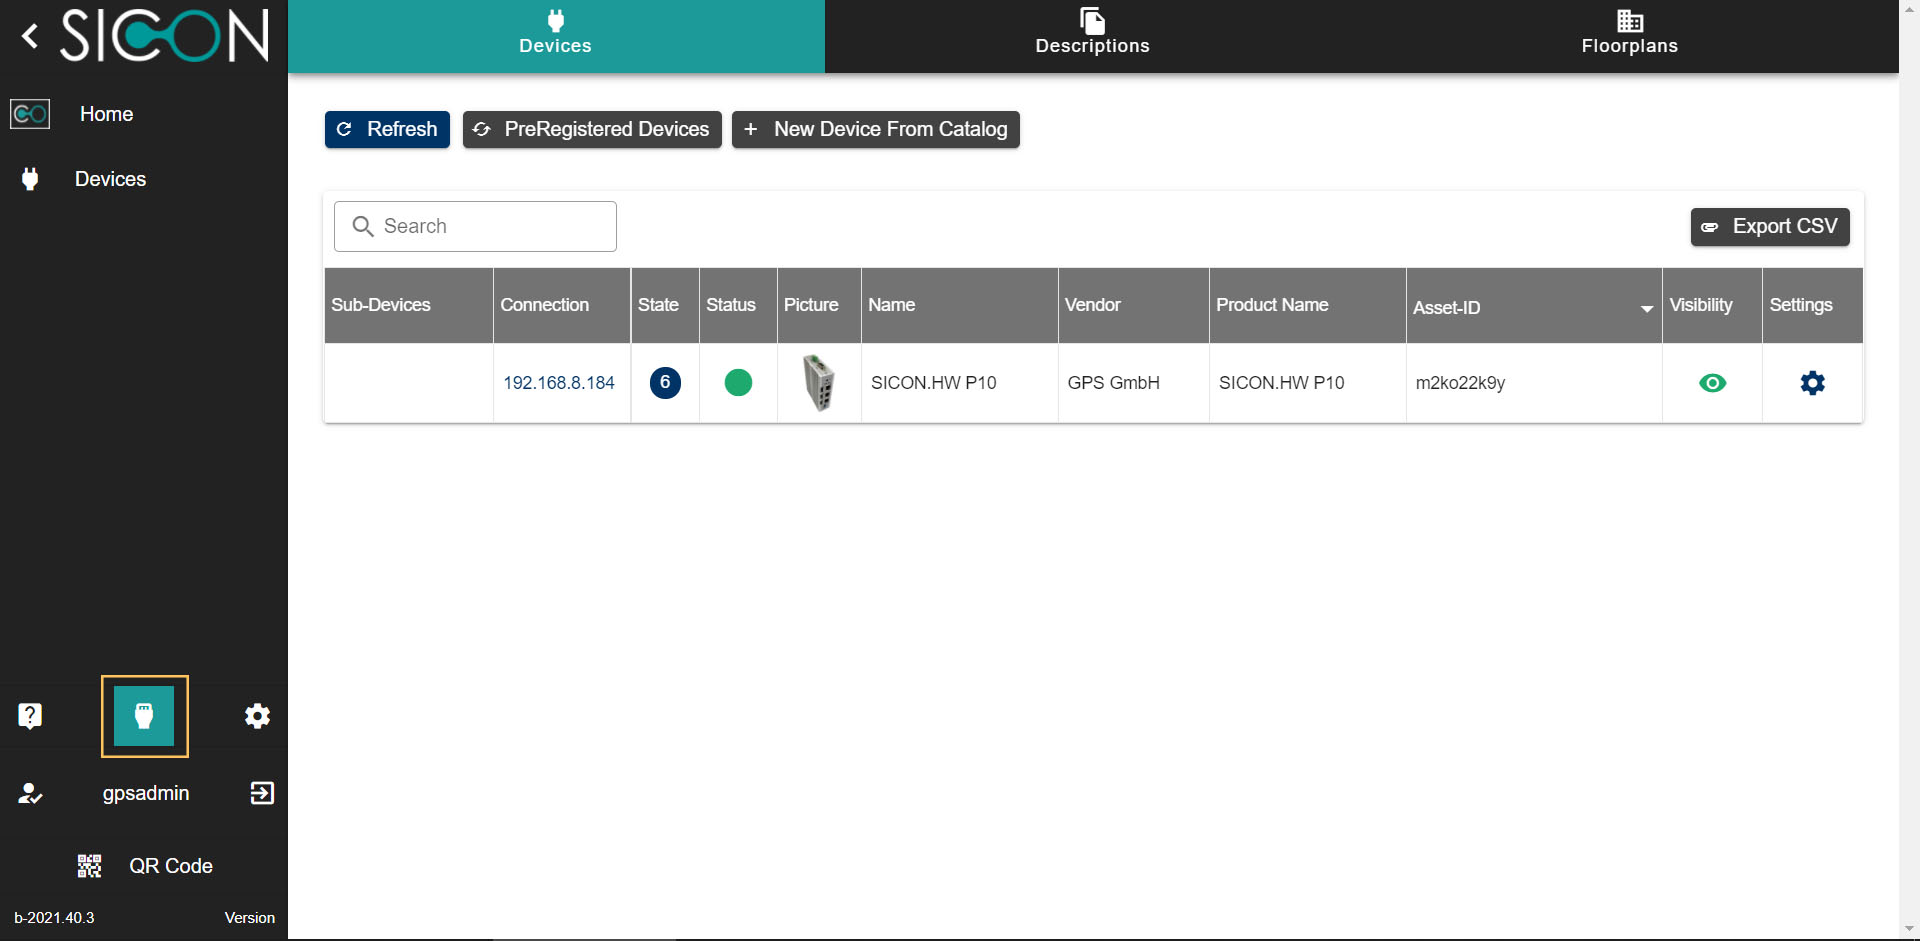
Connect your IO-Link devices via Asset Manager ➡ Prereg Scan ➡ Search New Devices
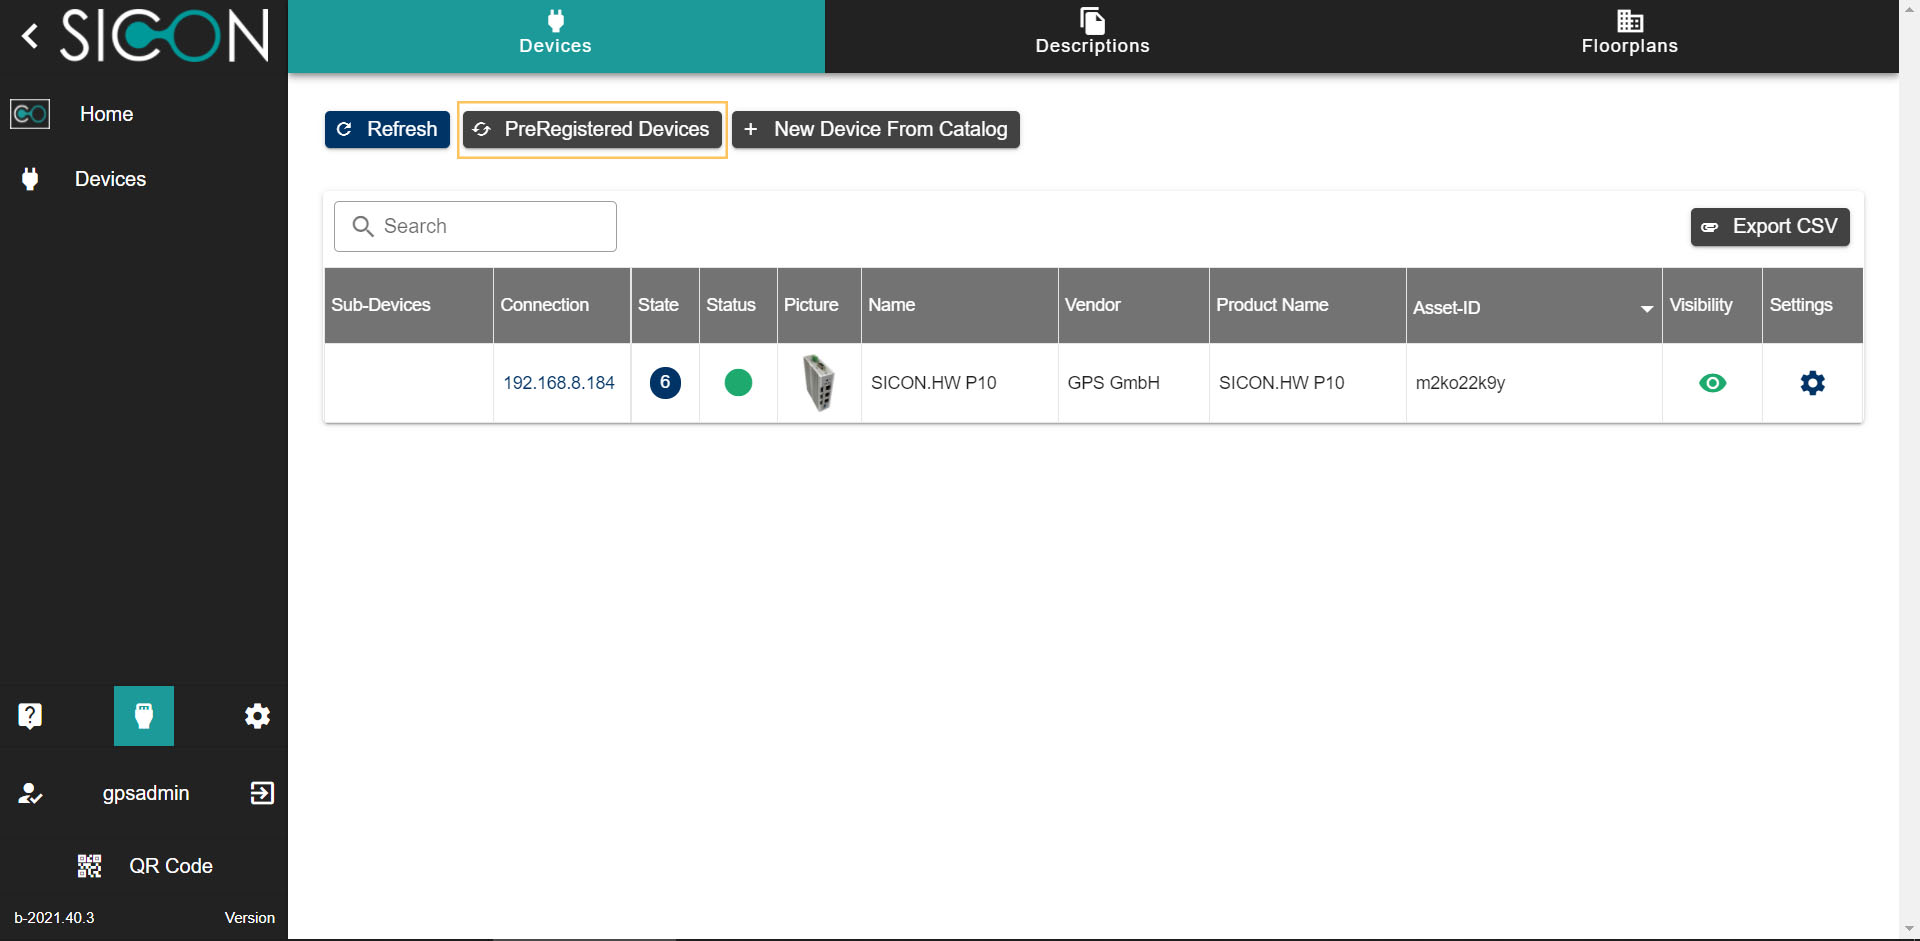

Register the device

Your device is now connected to SICON.OS
Example of required network configuration for Windows
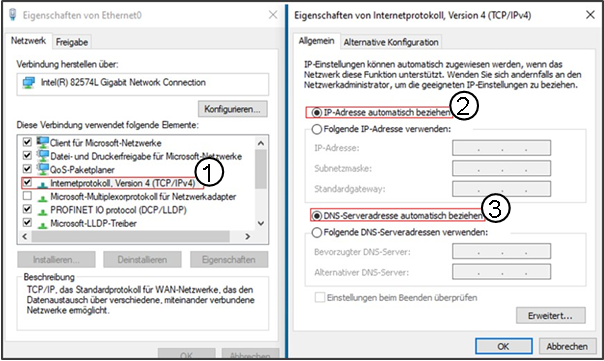
1️⃣ Internet protocol settings
2️⃣ Obtain the IP address automatically
3️⃣ Obtain the DNS server address automatically
IT network settings
The following IT network settings are required so that SICON can be operated properly:
Access to the endpoint "* .service.sicon.eco" must be enabled as follows:
Endpoint | IP | Port | Protocol | Direction | Purpose |
*.service.sicon.eco | 37.120.171.71 | 443 1194 | TCP UDP | outgoing | Wildcard Service/Remote |